10 Terms for a beginning Silhouette or Cricut user
share on social:
Are you a beginning Silhouette or Cricut user? One of the things that can feel overwhelming about this world of cutting and crafting is the feeling everyone is speaking a different language. Beginning Silhouette and Cricut users can easily feel overwhelmed. We are here to help!
When I first started out in this community I felt like half the time I was trying to look up what people were talking about in their post. (HTV huh? Isn’t that a TV channel?) Here are 10 key terms deciphered and explained all in one spot for your convince.
Top 10 Terms
Types of Vinyl:
- HTV: Heat Transfer Vinyl- This is the vinyl that is most commonly used on clothing, hats, shoes, and bags. It is NOT sticky (which makes it a whole lot easier to work with in my opinion) and if applied correctly and taken care of properly will last the life of the item it is attached to. (more tips on taking care of and working with HTV at a later date) You must apply HTV with an iron or a heat press. Siser Easy Weed is the only brand
 I use (I learned from several ruined shirts and bad vinyl experiences) and this bundle of HTV is an awesome starter pack because it has a little bit of every color but isn’t too over the top. I also LOVE Expressions Vinyl. They have a quality product that you will love.
- 651: Permanent Outdoor Adhesive Vinyl- It is extremely sticky and is what you would use to make decals for cars, windows, mugs, glasses etc. You even might use this to apply on a canvas or piece of wood to create a sign. Once this vinyl is applied and set, it is very difficult to peel up and if it is stuck to a wall it can even possibly remove the paint. Although it isn’t recommended to be dishwasher safe, with 4 kids, all my water bottles go on the top rack (hand washing just isn’t an option right now) and I haven’t lost a letter yet! (knock on wood) When using Oracal (the brand name) 651 vinyl you will also need to use transfer tape. Here is the bundle I first started with because it includes the transfer tape and a little toolkit to help apply the vinyl.
- 631: Indoor Removable Adhesive Vinyl– This vinyl is great for putting on a bedroom wall or creating a beautiful living room decal quote that you might want to adjust, remove, or take down at some point. Do not use this on mugs or glasses or it will very easily come off when washed and used frequently. This is also a great vinyl to use when creating a stencil for a sign or canvas to paint.
Materials:
- Heat Press: If you want to create shirts on a regular basis a heat press, in my opinion, is an essential item. It is basically a giant iron that gets way hotter and can apply a whole lot more pressure in order for your items to have a longer shelf life. They come at all price points and sizes but this one here is the one I have and can’t say enough wonderful things about it! The Cricut Easy press is also a great option because it is a little more affordable and very portable.
- Blanks: These are the items that you embellish and enhance with your creativity and cutting machines. They can be a shirt, a mug, a hat, a frame, you name it! You can find these at any shop (think Target, Walmart, Dollar Tree) but there are also companies that specialize in selling blanks just for us!! Here are a couple of my go to places for blanks if you don’t have a tax id:
- SVG: Scalable Vector Graphic- This is a file format that is most commonly used with cutting machines. Both Studio (if you have the Designer Edition) and Design Space recognize this format and if you purchase one of our files you open the SVG and cut the design. It really is that simple! Check out our freebies (and this video if you have Studio) to try out an SVG and make your first cut!
- Mock Up: This is a computer created image of a blank product with a design graphic on it. It is a great tool to help build your shop selection and to give proofs to your customers before actually creating the inventory. If you are looking for some awesome photos to use as a mock up check out the great selection over at Design Bundles. Also enjoy this short tutorial on how to make a mock up 100% FREE!

Tools:
- Mat: Cutting Mat- Some people never use a mat and some people always use a mat. It is basically a sticky flexible plastic base that you put the item on that you want to cut. Over time it may loose it’s stickiness or get worn out or even accidently cut when playing with your settings (not that I would know) so I strongly suggest to have a back up on hand if you don’t want to go commando. They come is several sizes but here is my favorite. It is longer than the one that comes in the machine and because I am one who love to use my mat I love having the extra space!
- Transfer Tape: This is the tape that you place over the top of your 651 or 631 once your design is weeded when creating a decal. You can use contact paper or actual transfer tape. They both work great and are a crucial piece to the creation and application process of your project. It is what gets your vinyl from one place to the next without losing its shape or design. Check out this post to find the best way to remove transfer tape.
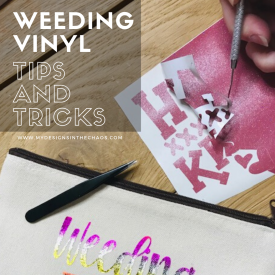
- Weeding: Weeding is what you must do each time you make a cut with your machine. It is where you take off all the unwanted material from your design. That could be the inside of your design, the outside of your design, it really just depends on what your project looks like but one thing you do need when weeding is a great weeding tool or pair of tweezers.
So there you have it! As a beginning Silhouette and Cricut user these terms should make you feel like a pro in no time at all. These 10 key terms will help when showing off your projects, posting in your favorite FB group, and chatting about your craft.
Have another term that you would add to the list, or maybe you have heard people discussing something that you aren’t sure what it means? Come check out our FB group, share, and ask away!!
Happy crafting!
This post contains affiliate links to products that I love and strongly recommend.
12 Comments
Leave a Comment

Learn to develop, and grow your crafting skills!
My mission is to develop, encourage, and grow your crafting skills, and confidence through freebies, tutorials, our club, and our signature course.

Behind the Chaos...
My name is Michelle and I am the creative director behind the chaos. I'm so are glad you are here and hope you find inspiration and confidence to create something beautiful out of the chaos in your craft room and in life.
free ebook!
Bring your creativity to life quickly and easily.
This guidebook will give you a detailed look into the creative crafting cycle called the Craft Maker Process.
This is. a great intro and so concise! Thank you
You are very welcome! 🙂
Thank you for this information! Now I know the difference in the Oracal vinyls!
You’re welcome!
[…] Cut one of the designs below out on parchment paper with cutting machine and then weed out the part that you want painted (check out more details of what I mean when I say weeding here.) […]
[…] you aren’t quite sure what I mean when I say crafting blanks this post is perfect for you. We go through all the terminology that you will in in crafting blogs, FB […]
[…] Also note that your machine will cut all those little sections… you will have to weed each of those out of the design. Curious about what I mean when I say weed? Check out this post here. […]
[…] well on toilet paper (aren’t sure what 651 is?… we decode the crafting jargon here). Check out the tutorial on how to create this same project with 651 […]
[…] to weed the vinyl design. If you aren’t quite sure what I mean with this head over to this post where we decode the crafter lingo for you. […]
Great, organized information. Easy to read and understand with a hint of warmth.
There is a particular vocabulary/ terminology for everything you do. Learning it will make using your product easier.
Absolutely!!