DIY Tote Bag with Heat Transfer Vinyl
share on social:
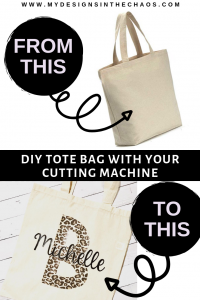
Have you ever seen a beautiful tote bag at the store only to find out that it had an outrageous price tag on it? Of course you have, because I have too! Or better yet you see one and think, I could totally make that myself but, you aren’t quite sure where to start? That’s where I come in. This DIY Tote Bag tutorial will have you cranking out your own bags in no time!
Friends, family, and even your kids will be asking for their own bags and you will happily oblige because one, it’s fun to make stuff for people we love, and two because these tote bags really are that easy.
Please Note: This post contains affiliate links which means at no extra cost to you we earn a small commission when you shop through our link.

Supplies:
- Heat Transfer Vinyl
- In the example below I used this leopard print HTV with a complimenting black HTV
- Cutting Machine
- Silhouette or Cricut will both work
- Weeding Tool
- Tote Bag
- Heat Press, Easy Press, or an Iron

Step One:
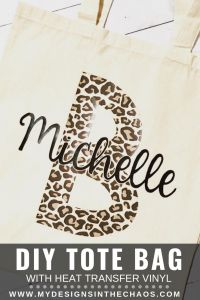
First you need to decide what design you would like on your bag. For this example I did my initial with my name through the initial. I liked the way it made the pattered vinyl really pop.
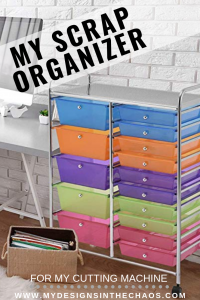
Then I was able to cut and weed out my design. Remember, it isn’t sticky until it gets hot so it is pretty easy to weed. Also don’t forget to trim down the edges around your design and save the scraps for later usage. My favorite scrap organizer is this one. Each drawer gets it’s own color.
Since this project is with heat transfer vinyl you will need to make sure your design is mirrored in your program.
Please Note that some patterned HTV does NOT need to be mirrored so just double check that before cutting.
If you are curious about the different types of vinyl and when to use what head over to this post where we fully outline everything you need to know about vinyl.
As soon as all of your heat transfer vinyl is weeded your design is now ready for application.
Step Two:
Now we are ready to apply your design to your tote bag. Make sure that your heat press, iron, or easy press is fully heated up. I typically like to have my press at 315.
When applying the design it is important to find the center of your tote bag. You can eyeball it (this is usually my preference) or you can measure. Those of you who prefer to find the exact center, check out this post here. We share our secret for always having things totally centered.
NOTE: You’ll want to make sure that you have a teflon sheet in between your vinyl and the top of your heat press. The teflon sheet works to ensure you don’t burn your HTV while transferring the design to your DIY tote bag.
Place your tote bag on the heat press and then put your heat vinyl transfer design on top of the tote bag with the transfer tape sticky side down. Do not use the heat press for the full time the first round if you are using more than one layer. If you’re doing a design that requires a second piece of HTV to be added then just press the first layer for a few seconds, peel up the carrier sheet, and apply the next layer.
If your design is just one piece, then, by all means, use the heat press for the full 15 seconds the first round. Then peel up the carrier sheet and give it one more final press.

Step Three:
Once you have all the layers of your design applied it is time for one more press. Remove all carrier sheets from over the HTV and press the vinyl one more time for a full 15 seconds. This will ensure that the vinyl is adhered properly to the tote bag. You want to be able to see the fibers of the bag through the vinyl.
As a side note if you crease the bag to find the center it will go away once you’ve completed the heat press transfer steps.
Watch us make the tote bag on a FB live here:
This is such a simple and quick way to spice up your DIY tote bag with patterned HTV. I hope that you’re able to enjoy this adorable tote bag year round no matter what type of design you decide to personalize it with.
On the bag in my example I did a knockout so that I didn’t have to layer vinyl at all. I eliminated the part of the design that was overlapping by creating an offset of the words that are on the top.
Thanks for being here and I would love to see what type of tote bags you create with your Silhouette or Cricut cutting machine.
‘Til next time happy crafting, cutting, and chaos.

Learn to develop, and grow your crafting skills!
My mission is to develop, encourage, and grow your crafting skills, and confidence through freebies, tutorials, our club, and our signature course.

Behind the Chaos...
My name is Michelle and I am the creative director behind the chaos. I'm so are glad you are here and hope you find inspiration and confidence to create something beautiful out of the chaos in your craft room and in life.
free ebook!
Bring your creativity to life quickly and easily.
This guidebook will give you a detailed look into the creative crafting cycle called the Craft Maker Process.