DIY Toy Storage
share on social:
The new show Tidying Up has me all kind of cleaning crazy around our house. I’m looking at things through a different lens and wondering if we really need them or not. Well, with 4 kids one thing that I know for sure is toy storage brings me joy. I want a spot to place all their items where it is out of my line of vision but still easily accessible for them to play with.
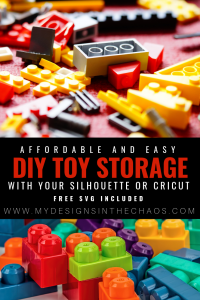
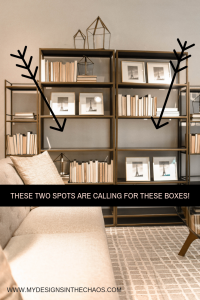
Once all of our toys are sorted and organized we need a slot to put them. Bins, baskets, and containers can get expensive so today I’m here to show you a super quick and affordable way to create your own personalized storage boxes with your Silhouette or Cricut cutting machine.
PLEASE NOTE THAT THIS PAGE CONTAINS AFFILIATE LINKS. THIS MEANS THAT WE EARN A SMALL PERCENTAGE WHEN YOU SHOP THROUGH OUR LINK.
SUPPLIES:
Empty Box
- I found an empty diaper box to be a great size
Contact Paper or Patterned Vinyl
- I like the wood grain style but pick one that works with you and your style
Silhouette or Cricut cutting machine
Cricut or Silhouette cutting mat
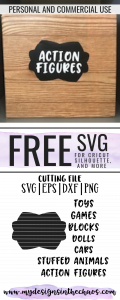
Free SVG file below
Step One:
The first thing that you will want to do cut off the top flaps of your diaper box. This is so much easier than folding them inside. (don’t ask me how I discovered this… lol)
It looks much nicer on the completed project and they don’t get in the way where you are putting things inside and taking items out of the box for storage.
If you are struggling cutting them off through the cardboard with your normal scissors and exacto knife will also easily slice them off. Just watch out for your fingers!

Step Two:
This is the key step in the project. It is where we will cover the entire box in decorative contact paper. In order to get one cohesive look around the box you will want to start on one corner (with the wood grain being horizontal to the ground like a sunrise) and follow the box all the way around the 4 sides.
Trim the end right at the edge of where the 4th side meets where you initially stuck the paper down.
As you are applying the contact paper I recommend using something (like a burnishing tool or credit card) to make sure it lays flat as you go. Apply from one side to the other as you try to keep the air bubbles at a minimum.
Doing it in one cohesive sheet, rather than pieces, gives the box a clean and more professional look. Much easier than having the ends trying to meet and match at each edge.
Once the box sides have been covered fold the top edge and bottom edge of the contact paper on each side in. Trim each corner to help the paper to lay flat. Think of it like a giant box to wrap.
The last section to cover is the bottom. Just trim off one sheet the size of the bottom and apply it smoothing it out as you go.
Step Three:
Now comes the part with our cutting machines. It is time to cut our box labels and designs in vinyl and weed them. Open up the SVG from below in your design software and cut it out once for each box you are labeling.
It is also time to decide what you want the label to say on each of your boxes. Cut those phrases out on adhesive vinyl. If you having trouble deciding on a font to use check out some of our favorite fonts here and favorite places to get fonts from here.
Once everything has been cut with your machine weed all your your labels. ( this might sound very weird to someone who is new and not familiar with the term. Check out some basic cutting machine terms here and our favorite tips on weeding vinyl here)
The label below would also be super cute if you used chalkboard vinyl. The you wouldn’t even have to add the white vinyl. You could use these chalk markers and switch out the label as needed.
Step Four:
In this step we use transfer tape to apply the design to your new toy storage box. In the video above I used paper transfer tape because the tack level was perfect.
I have found the the 100% clear can be very sticky at times. I didn’t want to have transfer tape getting stuck to the contact paper that I had already covered the box with.
We have an entire post on types of transfer tape including a quick reference guide here.
If you are more of an exact person or you know it will drive you crazy if it’s a little off then make sure to use a ruler to measure it out. If you have been here for a minute though you know I’m an eye-baller so I approximated it and am fine with the results.

Step Five:
Now you have an adorable new storage box. Repeat the steps above to create some matching ones and organize your little heart out.
I can even see these being super cute if you covered the boxes with patterned vinyl and used them to store craft supplies! The possibilities really are endless!
I can’t wait to see how you use this affordable DIY for storage in your space. Head over to our FB group to show off your finished projects.
Also, feel free to use the SVG file provided below for your labels. I’ve also included some generic phrases for labels that you might want to use but you can always personalize the bins and title them whatever you would like. If you would like to use the matching font feel free to download it here.
Before you download the file please make sure and take a second to pin one of the graphics above. It helps spread this easy idea with another crafter who would love the tip!
DOWNLOAD YOUR FREE SVG HERE:
*please note that I did not include a PNG image in this download*
As always we would love for you to share the link to this post for others to download but please don’t distribute the file itself. Thanks!
Now get to organizing, finding what brings you joy, and cleaning up the clutter! Until next time happy crafting, cutting, and chaos.
2 Comments
Leave a Comment

Learn to develop, and grow your crafting skills!
My mission is to develop, encourage, and grow your crafting skills, and confidence through freebies, tutorials, our club, and our signature course.

Behind the Chaos...
My name is Michelle and I am the creative director behind the chaos. I'm so are glad you are here and hope you find inspiration and confidence to create something beautiful out of the chaos in your craft room and in life.
free ebook!
Bring your creativity to life quickly and easily.
This guidebook will give you a detailed look into the creative crafting cycle called the Craft Maker Process.
thank you love the fonts
Thanks!