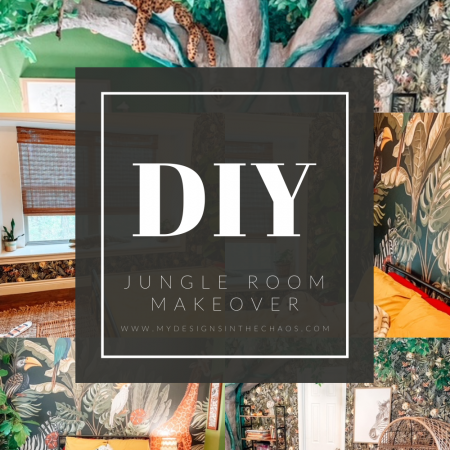
Dollar Tree Sign Makeover
share on social:
(Please note that this post contains affiliate links)
Today I am going to give a couple signs from the Dollar Tree a face-life with some adhesive vinyl from Expressions Vinyl. Let’s create an adhesive vinyl sign together.
We will be using a combination of patterned and solid adhesive vinyl that was included, along with a couple other decorative touches to really finish them off.
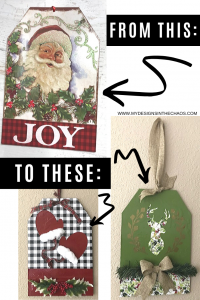
The first thing we need is the sign base. You could use thick plywood but I’m going to be using a pre-made sign from Dollar Tree because I’m all about quick and easy when it comes to crafting. With four kids and trying to squeeze my crafting in between all their activities and life, no one has time for hard crafts. Right?!
You can see in the image above what the sign looked like when I bought it for $1. Not bad but just not my style.
On a side note I absolutely love Dollar Tree. The have so many things that are great to use for crafting and re-purposing. And the best part is it’s ALL only $1 (and no this isn’t sponsored, I just love their supplies and products)

So here is what we are going to be using for this little upgrade.
Supplies:
Sanding block
Scissors
Hot glue gun
Exacto knife
Burlap Ribbon
Self healing mat
Adhesive Vinyl
Transfer tape
Dollar Tree Tag
Dollar Tree decorative pick
Cotton balls (for the mittens sign)
Cutting Machine (a Cricut or a Silhouette will work)
SVG design (Mittens or Deer Head)
On another random side note while I do design SVG files (we even have a course where I teach you how to design them as well) I also love to support other designers in the industry. If something has already been created exactly the way I want there is no need to re-create the wheel. Design Bundles is one of my go-to spots for quality files. Check out more of my favorite spots here.

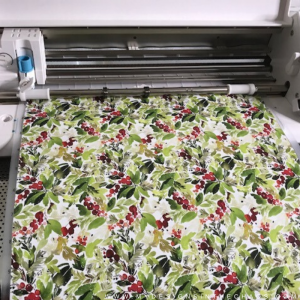
Ok back to the project. We have all our supplies and now it’s time to pair up a pattern print with a solid. This project is a fun way to experiment with a fun pattern without feeling pattern overwhelm. Start small and balance it out.
Step by Step Instructions
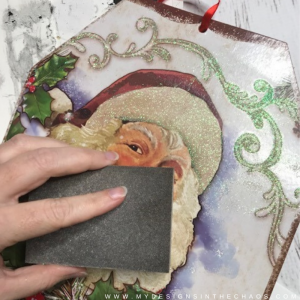
Now it’s time to prep our sign. The sign I grabbed had a little bit of raised glitter on it. Using a sanding block I sanded most of it off before I applied any vinyl. (I’m going to recommend you sand ALL of it off) The reason for this being if you leave some on there because your lazy like me, you will be able to see some raised spots once you apply the vinyl. Just fair warning.
Once the sign is sanded down, it’s time to get the base adhesive vinyl down.
The easiest way to do this is to use your scissors and trim down the vinyl to the appropriate size of the tag. Then peel off a tiny bit, start from the top of the sheet and slowly peel the back off squeegeeing your way down the board till the vinyl is flat.
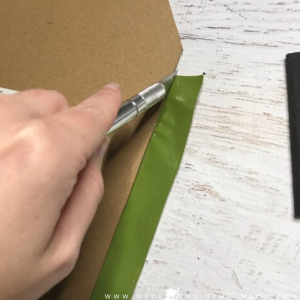
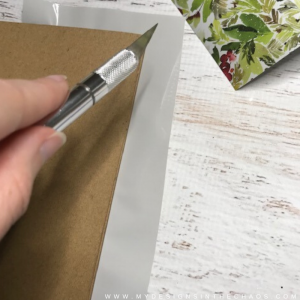
You will have some vinyl hanging off the side. That’s totally ok because once the base of vinyl is applied flip the board over. Use the exacto knife on the self healing mat to trim off the extra pieces. I suggest doing this on the self healing mat otherwise you will cut through whatever table space you are working on.
Then it’s time to add a nice complimentary vinyl on the bottom part of the tag. Apply the other vinyl you matched up in the beginning to the bottom 1/4. Remember it doesn’t have to be exact, I myself am an eye-baller, but you do want it to try to make ite even (but if it isn’t don’t worry because I’m going to show you an easy way to disguise it). Flip the board over and trim off the extra from the back again. Just like we did with the first large piece.
Now that we have the base applied it is time to prepare and apply the design.
The first thing we need to do to prepare our design is to cut it out with our cutting machine.
Next we need to weed it out. If this sounds confusing check out this post where we explain some of the common words used when crafting with a cutting machine.
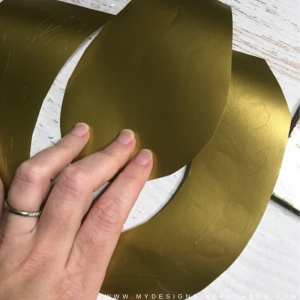
In order to waste less vinyl though I suggest trimming out the inside of the leaves and save that uncut vinyl for a different project. Just don’t cut them totally apart since they are already evenly spaced out.
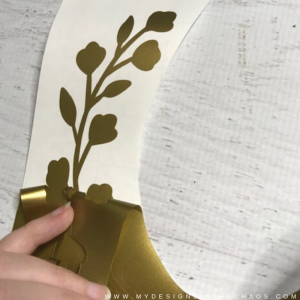
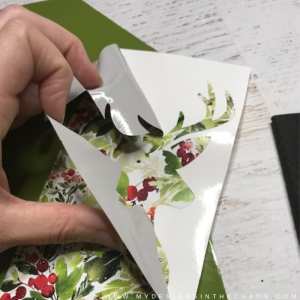
Then peel off all the vinyl that you don’t want to go on your project. The leaves and the deer head should be all that is left on the vinyl sheets.
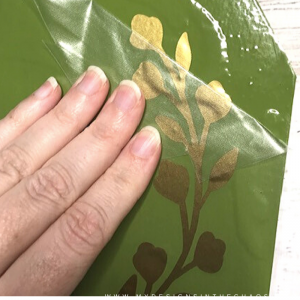
Once the design is weeded it’s time to apply the transfer tape.
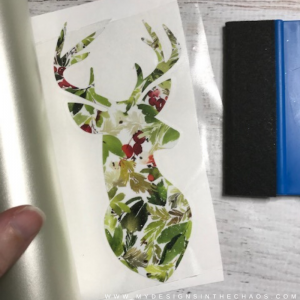
Gently smooth the transfer tape onto the weeded design. Pull off the back and apply it to your sign. Then remove the transfer tape. Check out the best way to remove transfer tape here. Repeat with all elements of the design.
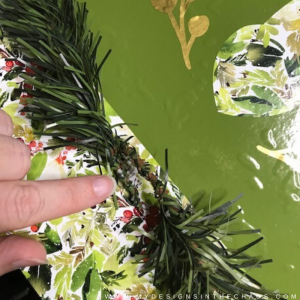
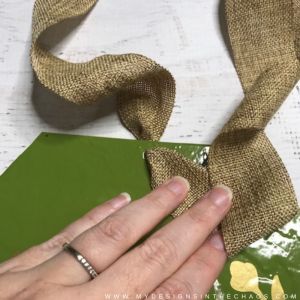
Now that the design is applied it’s time to add our final touches. I took a piece of greenery from Dollar Tree and cut it apart. Then I was able to hot glue each of those sections right under the deer head to help hide any unevenness from the two different vinyl sections meeting. I used some burlap ribbon and glued a bow right in the middle.
As the final touch I threaded some burlap ribbon at the top to tie the whole tag sign together and to give it something to hang from. (The sign came with a hole already in it)
Watch the time lapse where we did this exact same technique and created a mitten sign. Perfect for the holidays but also great as we move into January and February.
Grab the mitten SVG here.
I can’t wait to see how you bring this technique to life with your own adhesive vinyl sign upgrades as well as what vinyl pairs you make. Mixing and matching different colors, styles, and designs doesn’t have to be scary. Like I mentioned above just start small.
Looking for some more fun freebies to practice with?
Check out some popular ones here:
Thanks for hanging out today and make sure when you show off your creations online to give us a tag or show us in our FB group. The most fun part about crafting is seeing how everyone is able to add their own spin to the same project. And remember… there is no wrong way to craft! ‘Til next time, happy crafting, cutting, and chaos.


Learn to develop, and grow your crafting skills!
My mission is to develop, encourage, and grow your crafting skills, and confidence through freebies, tutorials, our club, and our signature course.

Behind the Chaos...
My name is Michelle and I am the creative director behind the chaos. I'm so are glad you are here and hope you find inspiration and confidence to create something beautiful out of the chaos in your craft room and in life.
free ebook!
Bring your creativity to life quickly and easily.
This guidebook will give you a detailed look into the creative crafting cycle called the Craft Maker Process.