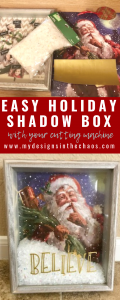
Easy Holiday Shadowbox
share on social:
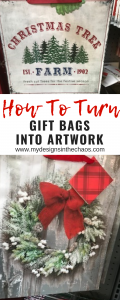
One thing that I love crafting during the holidays is a fun easy decoration that doesn’t cost a ton or take a long time to make. The project that I’m sharing with you today can be done is a variety of variations and can be personalized. An easy holiday shadowbox is something that will bring the magic of Christmas right into your home in 30 minutes or less. Let’s jump in and get started. (If you prefer to watch the video of us making it live just scroll down to the bottom of the post)
Please Note: At no extra cost to you, we earn a small percentage of the sale when you shop through the links we provide.
SUPPLIES
Shadow Box – This one from Amazon is super cute. The one we used in our live video below is from Hobby Lobby and were 50% off at the time of purchase. I recommend getting one without a slot in the top, since you will be adding snow to the inside of the box.
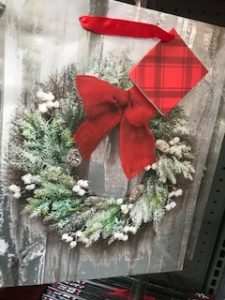
Gift Bag– The gift bag is the focal piece of the project. Make sure you pick one that you will love and will match your decor.
Pen or Pencil

The most crucial part of this project that will really make the craft pop is the gift bag. In our example we used a Santa but there are so many adorable gift bags that would look amazing, depending on the theme you were looking for. We found some super cute ones at Walmart. Check them out here:
Step One
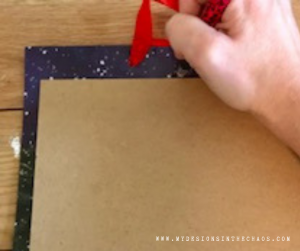
The first thing you will need to do is take the shadow box apart. Just like you would open the back of a frame do the exact same thing here. Then, using your pen or pencil trace the outline of the back of the frame onto the gift bag you have picked out. Make sure that the center of your design from the bag is on the center of the shadowbox bag. It should look something like this while you are tracing:
STEP TWO
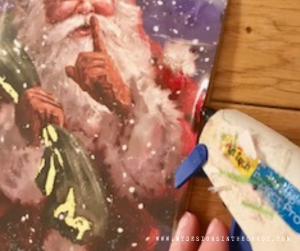
Next it’s time to cut. Following along the line that you just traced, cut out the outline of the back of the framed shadow box from the gift bag. (make sure to only cut one side of the bag so you can save the other side for a second project) Then, hot glue the gift bag to the backing of the box so that you can see it when the backing is reattached to the front.
STEP THREE
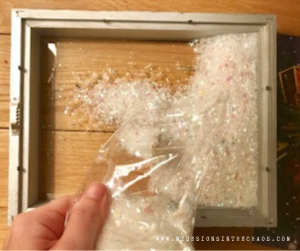
Without re-attaching the back just yet, flip the top part of the shadowbox over and pour the fake snow in. I like to use the kind has a little bit of sparkle… it adds to the magic of the finished product.
STEP FOUR
Now the frame itself is done and you could just leave it as is for decoration. But I love to jazz things up a little bit with my cutting machine so keep going if you want to do the same. Just re-attach the back (close it up) and it’s time to personalize. Decide what you would like the shadow box to say and cut and weed the design on adhesive vinyl. Check out the differences between vinyl types in this post here.
If you get stuck on what type of design option to add here are a few suggestions:
- Believe
- Last Name
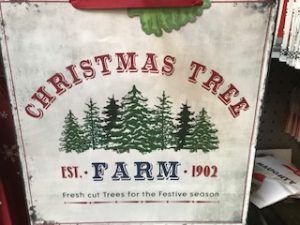
- Est. Year
- Merry Christmas
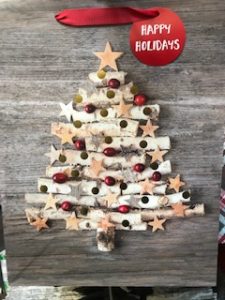
- Happy Holidays
The font we used in our design was TINKER from Kitaleigh on design bundles. It is available for personal and commercial use. Check out more of our favorite fonts here and here.
Also keep in mind you want your added word or words to match the theme of the bag. So, if you have a bag about a fresh Christmas tree farm then you might want it to say ‘5 cents’ or if you bag is a candy cane you could have it say ‘sweet’. This is where the fun and creativity really come into play.
STEP FIVE
Once the design is cut and weeded it is time to apply it to the box. Check out our favorite weeding tips here. Using your transfer tape, move the design from the sheet of vinyl backing to the front glass of the shadowbox. Make sure to clean the surface of the shadowbox first with rubbing alcohol and let it dry 100%. Also always remove the transfer tape like this. It will make the application process so much easier and will ensure a long lasting product on the shadowbox.
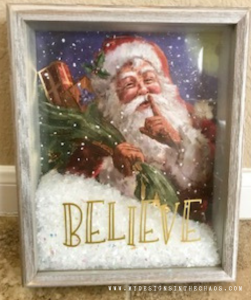
All Done! Adorable holiday decor without breaking the bank. My type of craft! Scroll down to watch us make it live! 🙂
This shadowbox craft is so versatile and is sure to bring the magic touch of Christmas into your home this holiday season. And one thing I love most and is so fun about this project is that you can do any sort of gift bag and turn this decor into the right fit for any holiday or occasion.
Check out how quick and easy it really is where we make it live here:
I would love to see your finished shadow box projects! Show off a picture below or over in our Facebook Group here and don’t forget to pin it for us too! We greatly appreciate it. ‘Til next time, Happy Crafting, Cutting, and Chaos!!
1 Comments
Leave a Comment

Learn to develop, and grow your crafting skills!
My mission is to develop, encourage, and grow your crafting skills, and confidence through freebies, tutorials, our club, and our signature course.

Behind the Chaos...
My name is Michelle and I am the creative director behind the chaos. I'm so are glad you are here and hope you find inspiration and confidence to create something beautiful out of the chaos in your craft room and in life.
free ebook!
Bring your creativity to life quickly and easily.
This guidebook will give you a detailed look into the creative crafting cycle called the Craft Maker Process.


[…] or year inside of the heart. It would look good on a sign like below or even in a shadow box like this one but instead of a Santa photo you could do a photo of your […]