How to have almost No Vinyl Waste
share on social:
When using your cutting machine I can’t think anything much more frustrating than wasting tons of vinyl. It’s like watching your money be cut to shreds…. literally.
Today I have put together my top tips for how to have minimal Vinyl Waste with your projects along with a free SVG to help serve as a reminder for you.


HOW TO NOT HAVE VINYL WASTE
- Use Weeding Boxes: Now this might sound really strange at first but hear me out. It is a simple strategy whether you have a Silhouette or a Cricut and it really works!
A weeding box is literally just a box or rectangle that you draw around any design that you cut. It makes a nice clean line around your design so when you weed you can keep your sheet of vinyl in tact. When you add the box just turn the color to transparent so you can still see what will be cut inside of it.
Please note: If you have a Cricut you will need to attach the weeding box to your item so that when you send it to cut on the mat they don’t separate from each other.
The nice part is you won’t end up with a million tiny pieces of vinyl cut in weird shapes that nothing will fit on. Check out this screen shot to see what I mean.
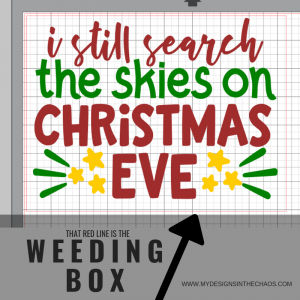
Grab the SVG pictured above here.
- Put a Reminder on Your Machine: I don’t know about you but I am always forgetting to mirror my vinyl when I use heat transfer. Even though Silhouette now asks you if you want to mirror, I have found that a decal on my machine is AMAZING. It helps me so that each time I go to load my cutting mat I can remember do I need to mirror or not. I make tons of shirts and no-one has got time (or money) to be wasting vinyl and cutting the same design over and over because you forgot to mirror. I just applied the reminder pictured below with adhesive vinyl to the cover of my Silhouette. You can do the same thing on a Cricut.
DOWNLOAD YOUR FREE SVG FILE HERE
- Note your Cut Settings: In addition to the reminder on the machine to mirror, I also have a little sticky note that has each material I cut with and the cut settings next to it.
You can use a sticky note, have a google doc, really whatever is easiest for you as long as you document it somewhere.
While the machines do have a ‘standard’ setting for each material I have found that sometimes the standard setting just doesn’t do it. Each machine is so different that when I find the exact cutting that works with mine I don’t want to forget it. I have Glitter HTV, HTV, Adhesive, Paper, etc on one row with the exact number setting next to each one so I don’t forget. While at this point I pretty much have them memorized, at the beginning this was a HUGE time and money saver for me.
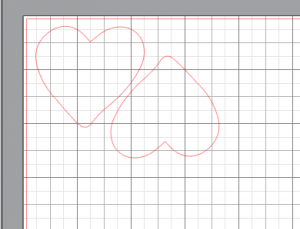
- Arrange (or nest) Your Items: Within your software you want arrange where you items go on the mat. Make sure that when you are lining things up that you move them where they waste as little vinyl as possible. Line things up, turn something upside down, and squeeze it in there like you are fitting into your favorite pair of jeans. This will save excess wasted vinyl from the middle areas. (see how we squeeze the two hearts together rather than lining them up and having wasted space on the bottom)
- Do a Test Cut: In the Silhouette Studio program it gives you the option to do an actual test cut which is a circle with a triangle in it. You can peel up the circle and see if the triangle stays. In Cricut while they don’t have that specific feature you can open the SVG below and put small, on the top left corner of your design and only select that section to cut. This will help you to test and see if your settings are correct before cutting everything and wasting vinyl.
DOWNLOAD YOUR FREE TEST SVG HERE
- Save Every Single Piece: If you have watched any of our lives or been a reader on our blog for a minute you will know that we LOVE to save our vinyl. I can’t stand throwing stuff away that could potentially save me from buying more…. ok I still buy more but also LOVE to make projects out of scraps. I use this organizer and save my scraps by color. It helps me to stay organized and waste less vinyl. Check out more of our favorite organization solutions here.
What about you? Have any tips or tricks of the trade? Share them below so we can help each other out!
What do you do to waste as little vinyl as possible?
As always we would be so grateful if you shared these tips and tricks with a friend on social media! Happy crafting, cutting, and chaos and see you next time!
22 Comments
Leave a Comment

Learn to develop, and grow your crafting skills!
My mission is to develop, encourage, and grow your crafting skills, and confidence through freebies, tutorials, our club, and our signature course.

Behind the Chaos...
My name is Michelle and I am the creative director behind the chaos. I'm so are glad you are here and hope you find inspiration and confidence to create something beautiful out of the chaos in your craft room and in life.
free ebook!
Bring your creativity to life quickly and easily.
This guidebook will give you a detailed look into the creative crafting cycle called the Craft Maker Process.

I’m a newbie… how do i add a box (weeding) around my design? Thanks
Using your shapes tool in the design program draw a rectangle around whatever area you are going to cut. 🙂 This becomes your weeding box. Hope that helps!
that gives me a solid box… is that right?
Yes a box is exactly what you want. Because you will pull the box off and be left with your design. (unless you are using it as a stencil for paint and then you will trim off the box, weed out the design, and use that box as your stencil)
that gives me a solid box… is that right?
I’ll give it a try. Thanks!
How do I arrange things on my mat so they take up less room? Like where you flipped the heart….
Thanks
I have discovered that using the box works great to save wasted vinyl. I also take a piece of transfer tape and cut it the same size as my weeding box. As I pull the weeded vinyl off, I place it on the transfer tape. Then I get 2 transfers out of one box. No wasted vinyl at all. Takes a little more effort but works great, especially on bows and ribbons.
Great Tip!! Thanks for sharing!
Is there a video showing how you do this?
This video is an awesome tut on making weeding boxes!
https://youtu.be/ziHunuT2LXg
I just bought printable vinyl and printed a design that is not even 1/4 of the sheet of printable vinyl. While I could cut a “piece” of the paper for another design on my cricut, how would I run it through my printer first? Or do I just end up wasting all that printable vinyl? Could I actually tape it to a regular sheet of paper? I can’t image that would work. Any ideas would be appreciated.
Hello! I would just move the design to the other side of the paper and run it through the printer again. You could totally tape it but be careful it doesn’t get jammed.
Have you found any markers that wash out of 100% cotton T-shirts?
Any washable marker like Crayola washable should come out.
I have a Cricut Joy (I’m new) and everyime i cut an image, it cuts 1″ down from the top, so I keep getting waste. How can I fix this? 😬
Thank you!!
I personally do not have a Joy, but seems like possibly a setting. You could also move the vinyl down 1″ and see if that’ll help you not waste that inch anymore.
I had a joy recently got a bigger machine but yes just move your vinyl down an inch. I feel like its a margin setting but I never invested that much time in yo fighting it out 😂 my other gripe was if my designs weren’t welded it would arrange them how IT WANTED TO haha.
I have been saving my odd pieces of vinyl and going old school and running them through a manual sizzix for die cutting and even some punches work on it as well.
That’s a great idea!
Hi! I am a newbie with a cricket maker three. I purchased an SVG file ready to print mat#1. Is there a way to edit a file so there is not material waste in between images if there’s one At the top of the mat and one at the bottom? Soooo much wasted vinyl in between
Thank you so much.
I have the old cricut explore and I can only cut when usb is plugged into my machine and computer, but I LOVE LOVE LOVE the new feature SnapMat on the iOS app that lets you take picture of scraps on the mat and then it fits your project to them!! I may have to upgrade my machine finally!! https://m.youtube.com/watch?v=RoyDsKl-ndQ
Thanks for the tip!