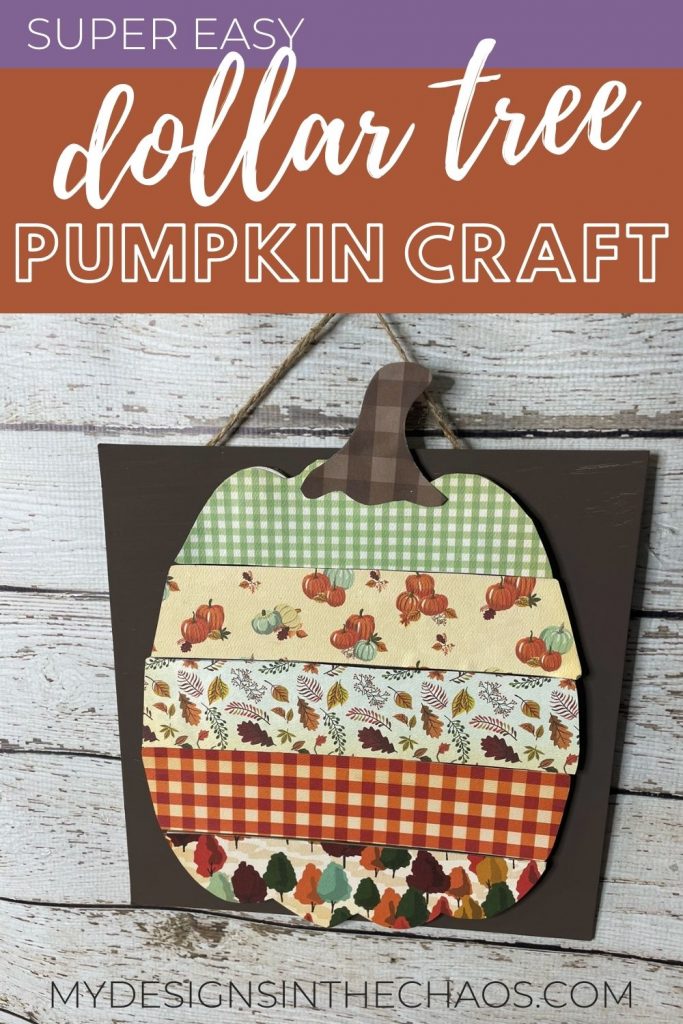
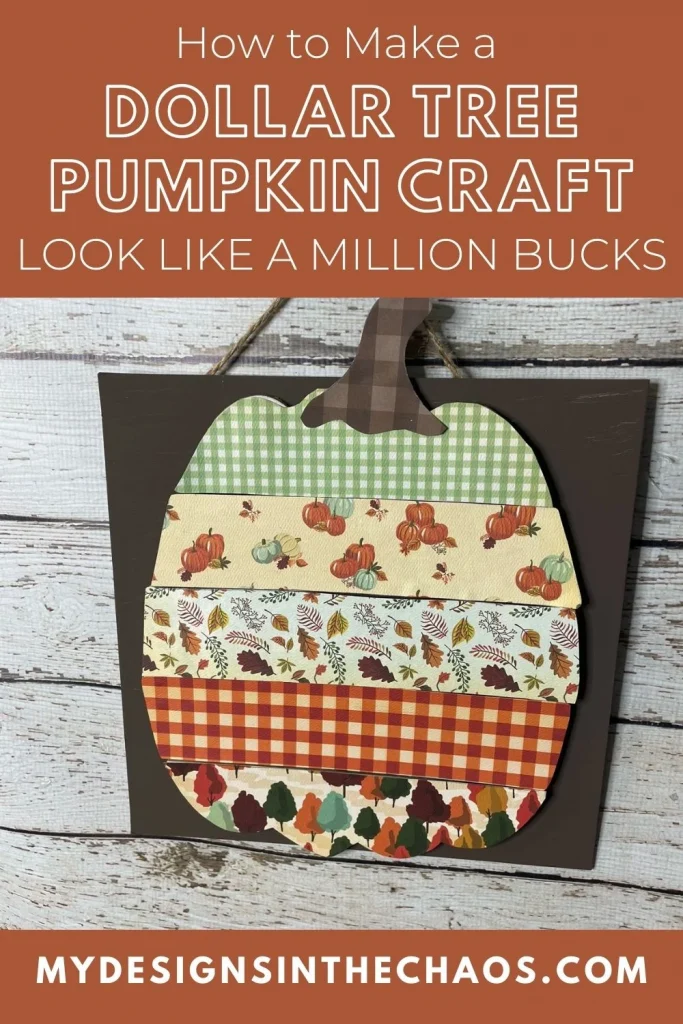
How to Make a Dollar Tree Pumpkin Craft Look Like a Million Bucks
share on social:
This Dollar Tree pumpkin craft is super simple and inexpensive.
The part that I am most excited about is seeing how you add your own special touches to it.
We’re using a couple of signs from Dollar Tree for this project.
You can find these cute signs, and then give them a makeover to give them a whole new look.
We love DIY Dollar Tree makeovers!
One of our goals at My Designs in the Chaos is to get YOUR creative wheels spinning. Of course, you can just replicate a project we make in our Make It with Michelle tutorial videos.
But I want you to be able to put your own creative spin on it so that it meets your needs.
Before we get into the project, I wanted to remind you that you can watch the tutorial replay here:
Supplies and tools for our Dollar Tree pumpkin craft
- Signs from Dollar Tree to use as the base (one large square) and one that has slats tied together to make the shape of a pumpkin
- Card stock in fall colors and patterns
- Foam brushes — one for paint and one for mod podge
- Brown chalk paint (or acrylic if that’s what you have)
- Scissors and a pencil
- Mod podge
- Hot glue gun and glue
Tip: We would want to remove the glitter if we weren’t going to put something over this sign. Just use some sandpaper and gently sand it off if you want to get rid of it. We’ll just leave it there though since it will be covered.
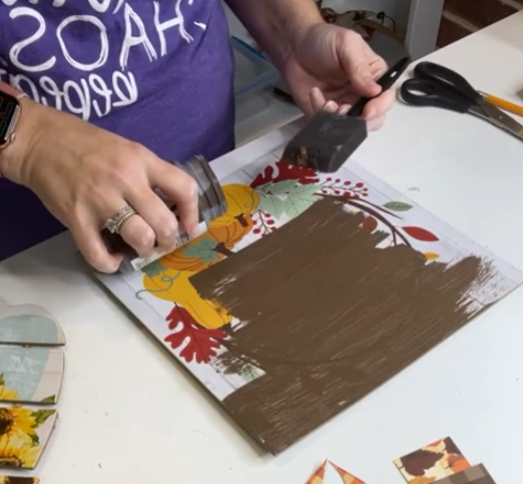
Step one
Use a foam brush and paint the square sign with brown chalk paint. If you can’t remove the twine or ribbon hanger, just tuck it in the back so you don’t accidentally paint it.
Sometimes it can be tough to get the edges without painting your work surface so find a little platform or use tripods to lift your base off of it.
Let the first layer dry and then you’ll paint a second layer later.
Step two
Cut the pieces from the pumpkin sign apart while the base is drying.
Paint the second layer of brown on the square base.
Make sure the outside of the square is really covered so you don’t see any white streaks coming through.
If you use acrylic paint, you might need to paint more than two layers.
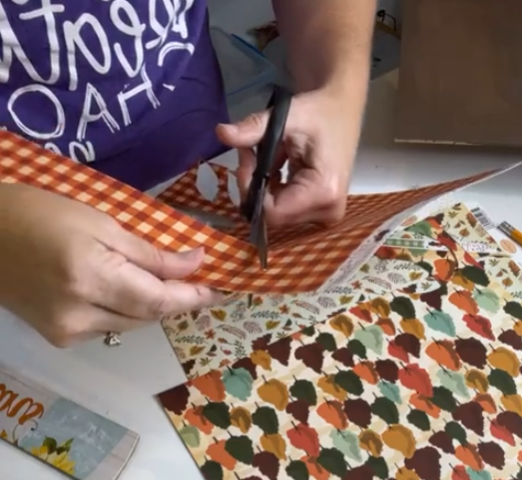
Step three
Outline the various sections of the pumpkin on your card stock and trace each one onto the different pieces.
Mix and match colors and patterns to make exactly what you like and will look good in your space.
It’s better to make the pieces a little bit larger than the slats so you won’t see the slats.
Just look at the sheets you have and decide what order you want them in. Use scissors to cut out the pieces.
So here’s a question — do you like using solid colors, or do you like using patterns? I love using patterns and mixing and matching them.
But that’s the great thing about these projects.
If solids are more your style, use this Dollar Tree pumpkin craft tutorial as a guide and make a more traditional-looking pumpkin.
Step four
Cut out a piece for the stem. I used a brown plaid.
My sign had some hot glue on the top slat, but I just left it. If it bothers you, just remove it.
This whole project could be made with adhesive vinyl. An ombre look would be so cute! You could mix and match colors with that too.
Adding names or years established for a family would be really sweet too. This Dollar Tree pumpkin craft would also look great tucked inside a fall wreath.
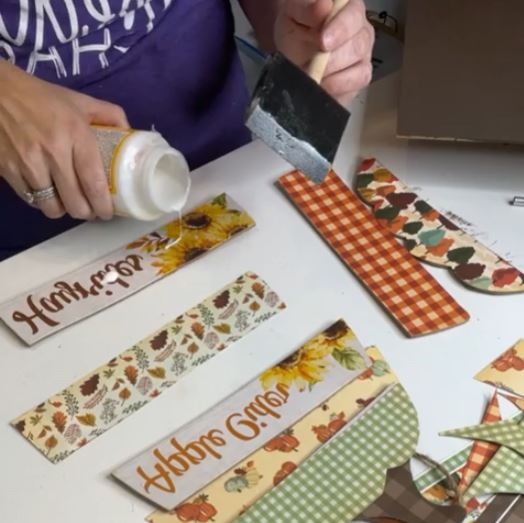
Step five
Use a foam brush to spread mod podge on the back of the card stock and adhere to your card stock layers.
Press it down firmly to make sure it sticks. You could put mod podge on top as well. I didn’t want a shiny look though, so I did not do that step.
Remember that none of this has to be exact. That’s the fun of giving it a patchwork look.
Step six
Remove the string from the top of the pumpkin since there is a hanger on the square base.
Line up all the pumpkin pieces and use a hot glue gun to attach them.
Personalize your Patchwork Pumpkin
Add a bow, or use a bow instead of the twine or ribbon hanger.
Use various shades of cream and white for the pumpkin and a sage green background for a completely different look.
Or make it a Halloween decoration by adding jack-o-lantern face pieces in vinyl or black card stock. There are so many possibilities!
This Dollar Tree pumpkin craft is a great way to bring more fall into your home decor for not a lot of money.
It’s kind of like using all of the cute parts of pumpkins with none of the carving!
We just repurposed signs by painting over or covering up pieces with card stock and combining them into one adorable pumpkin artwork.
We’d love to see how you make your pumpkin! Share your project pictures so we can ooh and ah over your version of it.
Sprinkle the love for us on Facebook and don’t forget to check out our YouTube videos too!
If you liked this Dollar Tree pumpkin craft you might also like:
Did you love this project? Pin it for later!

Learn to develop, and grow your crafting skills!
My mission is to develop, encourage, and grow your crafting skills, and confidence through freebies, tutorials, our club, and our signature course.

Behind the Chaos...
My name is Michelle and I am the creative director behind the chaos. I'm so are glad you are here and hope you find inspiration and confidence to create something beautiful out of the chaos in your craft room and in life.
free ebook!
Bring your creativity to life quickly and easily.
This guidebook will give you a detailed look into the creative crafting cycle called the Craft Maker Process.