How to Make a Memory Jar with Adhesive Vinyl
share on social:
Simple DIY Memory Jar with Adhesive Vinyl
Every year our family collects highlights and special moments during the year in a memory jar. At our dinner on New Year’s Eve we read through all the memories we have each written down over the past twelve months. It is a fun way to keep a journal as a family and a tradition that everyone looks forward to.
As we open the papers in the glass memory jar ,we chat about the events of the year. This tradition helps us remember and outwardly express gratitude for the tiny details that we might have previously just skipped over. I am so grateful for the ritual this has created in our family on the New Year holiday.
Usually we drop post it notes in an empty container that is a big eye sore on our kitchen counter. After several years, I decided it’s finally time to make something more attractive! This memory jar is something that sits out on our counter all day every day… why not make it something we want to look at?
How Does It Work?
The cool thing about the tradition of a memory jar is literally anyone can do it. Even my youngest who is working on learning how to read and write still can draw pictures and add them to jar. It gets his ideas across and is such a fun keepsake to have.
Here is how we implement this tradition (but keep in mind you do what works for your family). We keep a little pad of post it notes and a pen right next to a jar on our kitchen counter. I recommend you putting it in a high traffic area that you and your family go by often. That will help all of you to remember to write the memories and moments down as you go. When something funny, good, positive, or memorable happens take a second and jot it down on the post it note, fold it up, and place it in the jar.
When you are first starting, to ensure that everyone is adding to the jar, you might want to add it into your daily routine. Every night before dinner, or after brushing teeth, etc. take 5 minutes and have everyone write down a positive moment from that day. It’s no fun if NYE comes along and some people didn’t contribute.
Make It Pretty
Like I mentioned earlier, we had been doing this for several years and our jar was a bit of an eye sore. This was tricky though because it needed to be large enough for the 6 of our notes. A small mason jar just didn’t cut it…. Plus the mason jars have ridges and that wouldn’t work with a decal.
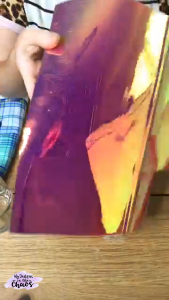
So, I decided to get a simple glass vase from the Dollar Store and add a little spice with a holographic adhesive vinyl decal. Let me walk you through the simple process.
Please note that this post contains affiliate links. This means at no extra cost to you I earn a small commission.
Supplies:
Cutting Machine
SVG File
(we have a whole blog post with a motivational svg file that you might love)
Glass Jar from Dollar Tree
Scissors
Fabric (this is just to place the jar on so it doesn’t roll while applying the decal)
The Process
Cut
The first thing you will want to do is upload your design into Cricut Design Space or Silhouette Studio (depending on which cutting machine you own). We have outlined that step by step process for both cutting software programs here. The SVG file that I used is a Club Chaos exclusive design. Learn all about the benefits of our Club here. We would love to have you in our crafty sisterhood! OK back to our project.
A few reminders as you go to cut your design:
- Do NOT mirror your image for adhesive vinyl
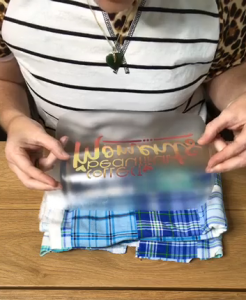
- Place the decorative shiny side of your vinyl (pictured below) face up on your mat. The backing faces down on the sticky part of your cutting mat.
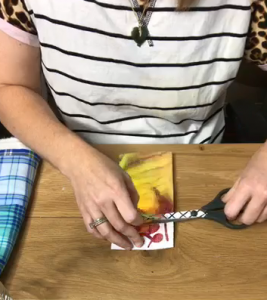
Once your design is cut it is now time to weed your image. This means that you are going to remove all the vinyl that you do NOT want transferred onto you memory jar. For this particular project I probably should have cut the vinyl a little bit deeper. Specialty vinyl is usually a little thicker than normal adhesive and therefore requires a little more pressure from the cutting machine blade. Read about all the different types of vinyl over on this blog post here.
Since it didn’t cut as deeply as I would have hoped, it was tricky to weed. Still salvageable though! I decided to trim off the extra pieces of the sticky vinyl as I went so as not to accidently have it fold over and ruin my design.
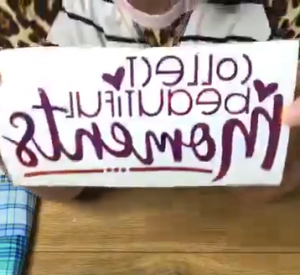 (I know it is backwards to y’all…. that’s because FB live reverses the image… trust me in real life it is the correct way. Do NOT mirror your image!)
Apply
Now that the vinyl is totally weeded it we can apply our transfer tape. I get asked ALL THE TIME about my transfer tape. Because I have such specific preferences in this area (trust me I have tried TONS) I wrote a full blog post about my favorites and when to use what here. For this memory jar project I used my tried and true clear roll from Expressions Vinyl.
![]()
When applying the transfer tape I suggest using something to help flatten it as you smooth it over the decal. I use a burnishing tool but you can also just as easily use a credit card, driver’s license, or student id. The goal is to eliminate any bubbles that might pop up as you go.
Once your transfer tape is applied now we can peel off the back of the vinyl. Be careful at this stage because the vinyl and the transfer tape are super sticky! You don’t want to mess up your memory jar decal now, we are almost done!
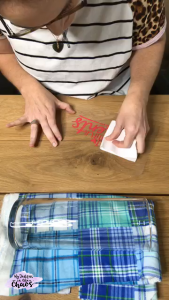
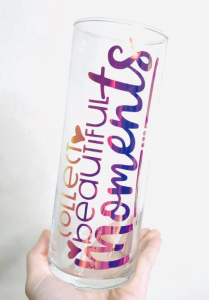
Place the decal on your glass vase or jar and smooth it out. In order to make sure the decal was lined up properly I used a fabric that had lines. I was able to use those lines as a guide since the jar was glass and my transfer tape was clear. I always work from the center outwards as I am applying my decals. This helps press out the air and remove any potential bubbles in my vinyl.
It’s time to remove the transfer tape. When removing transfer tape always fold it back on itself. Never pull upwards to the sky. The upwards pressure can make it harder for the vinyl to stick to your finished project.
![]()
Now you have a beautiful glass memory jar that you can record and keep special moments and stories in throughout the year.
Additional Memory Jar Ideas
Not really into creating a memory jar? Check out this quick list of other ways that you can still record and keep beautiful moments throughout the year.
- Written Journal
- Voice Notes on your Phone
- Daily Photo
- Keeping a planner
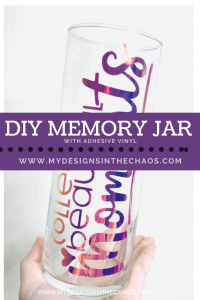
I can’t wait to hear about how you implement this tradition into your family. Have an idea of something that you do with your family? I would love to hear about it below! Also don’t forget to pin the idea for later!
Thanks for hanging out with me today and ’til next time… happy crafting, cutting, and chaos!
7 Comments
Leave a Comment

Learn to develop, and grow your crafting skills!
My mission is to develop, encourage, and grow your crafting skills, and confidence through freebies, tutorials, our club, and our signature course.

Behind the Chaos...
My name is Michelle and I am the creative director behind the chaos. I'm so are glad you are here and hope you find inspiration and confidence to create something beautiful out of the chaos in your craft room and in life.
free ebook!
Bring your creativity to life quickly and easily.
This guidebook will give you a detailed look into the creative crafting cycle called the Craft Maker Process.

I love this idea…..Thinking I need to make one. I wonder if my husband would participate though. It is just him and I and our Lilly cat here. I may have to open it up to all who come over and have them write special notes about their visit.
How special that would be!
I really liked your video. Would love to see more.
Thank you so much! I appreciate those kind words!
I really liked your video. Would love to see more.
So cute love this
So glad it inspires you!