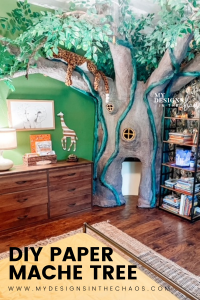
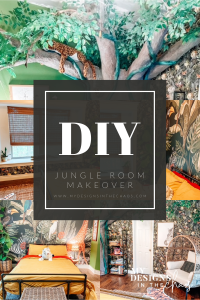
A Paper Mache Tree is The Star in this Jungle Room Makeover
share on social:
When we moved into our house about a year ago one of my boys got the last pick of which room would be his and so we agreed his room would be the first one we update. We asked him what style he wanted in the room and without hesitation he said he wanted a jungle room with a tree. Luckily my husband has experience with paper mache which is how the paper mache tree and jungle room makeover came to be.
Before I could start actually working on the room, I needed to come up with a vision for what it would look like. I knew that the room would include some sort of paper mache tree and have jungle themed wall paper.
Vision Board and Planning
To organize my slew of ideas, I first created a vision board for the room inspiration. Here is a peek at what the initial vision board looked like.
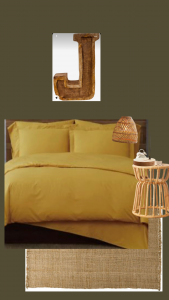
From there, I started looking for coordinating wall paper. I wanted the room to look cohesive but not symmetrical. Having wall paper on all the walls in addition to the paper mache tree felt a little heavy. Instead, we decided to break it up with a large mural, a solid painted wall, and then the jungle wallpaper.
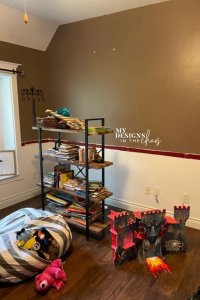
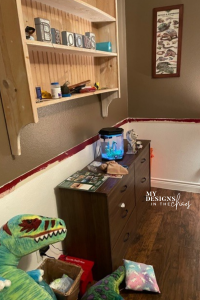
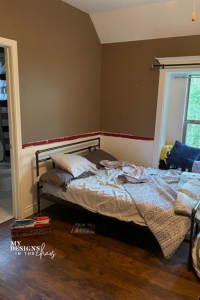
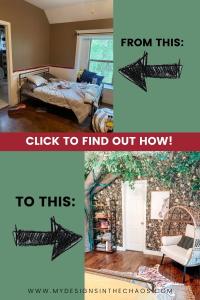
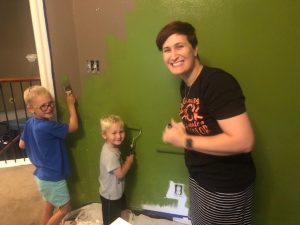
I ended up ordering the wall paper and while we waited for it to arrive it was time to get to work. Here is a peek at what the room looked like when we started:
I just love a good before and after, don’t you?
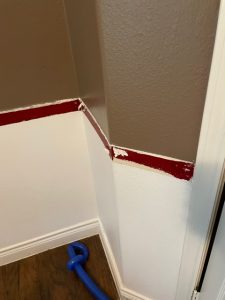
Chair Rail Removal
As you can see in the pictures above, the room originally had a chair rail on every wall, so in order to put the wall paper up and have space for the paper mache tree, the chair rails had to be removed.
I followed a tutorial over on Just Call Me Homegirl which was super easy and got the rail off the wall in no time. We did have to go back over some of the spots and smooth them out, fill some holes, and then smooth again. That way it would be ready for the wallpaper.
Wall Paper Application
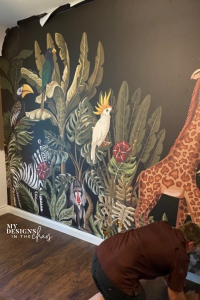
Now that the walls were all prepped and ready to go (and the wall paper had finally arrived) it was time to apply. We started with the wall that I knew I wanted to place the large mural on.
This mural was peel and stick and was tricky. If the panels didn’t line up exactly it was super noticeable.
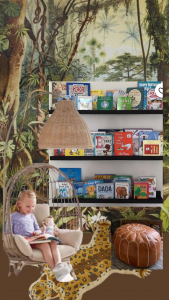
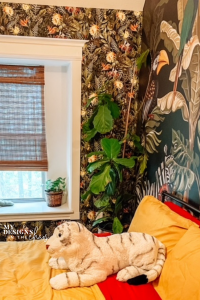
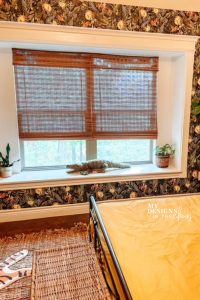
On the window wall and the bathroom wall we decided to go with a much busier print. This gives it a surrounding feel of leaves and jungle. This wall paper print was much more forgiving as it was being applied and lined up.
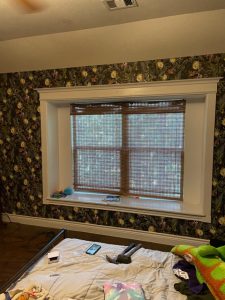
We also added some blinds to the huge window for texture. It also helps with shade and morning light.
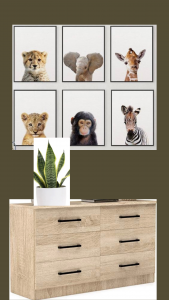
On the final wall I matched a green from the wall paper and painted.
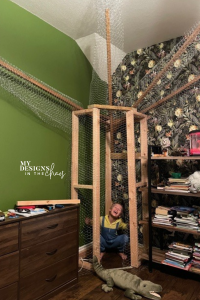
Framework for the Paper Mache Tree
Once the walls were done it was time to start building out the frame for the tree. Originally I wanted to place the tree in the corner on the wall of the bathroom and the wall of the window. In the end we decided against that for several reasons but the two big ones were:
- There wasn’t enough space to build out the branches and not block the windows.
- That location in the room is directly across from the door and we wanted the paper mache tree to be a ‘hidden gem’ and be seen once you enter the room.
The number one thing of importance for me, was that the tree framework would be strong and stable. Paper mache can get heavy and it needed to support the weight of it on the branches. My son also wanted to be able to go inside of it (like a cubby hole) so it had to have a hollow base.
Here were the materials that we used to build out the framework so it would be solid enough for the weight of the paper mache:
- Chicken wire
- 2×4’s (for the base)
- Screws
- 1×1’s (for the branches)
- Tree branches
- Masking Tape
You can tell my son is already getting super excited with his goofy expression!
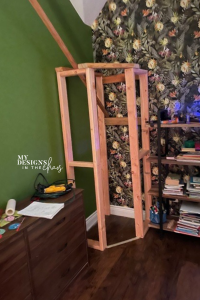
In order to help the tree project look even more realistic we took branches from the yard and secured those into the frame work as well.

Once the frame was built and wrapped in chicken wire, we wrapped it in masking tape to add to it’s stability.
Paper Mache Tree Glue
When we were sure the base of the tree structure was solid and stable it was then time to start adding the actual paper mache. For the first coat we used shop rags and glue to make sure that the boys wouldn’t be able to accidentally poke holes in it and damage or ruin it once it was built.
The first layer of glue consisted of the following ingredients:
- Wood Glue
- Joint Compound
- Water
For the final layers of paper mache (when we were using paper instead of cloth) the typical paper mache mix worked great. Flour, water, and wood glue.
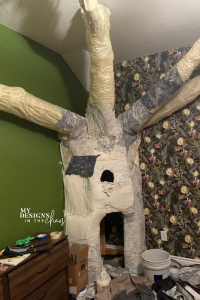
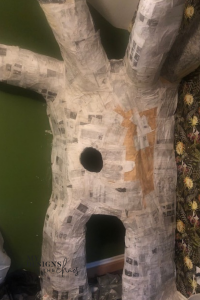
Adding the Paper Mache
Using cloth for the first layer of the paper mache went pretty smoothly on the main part of the trunk. By the time we worked our way up to the branches things got tricky. The weight of the cloth when it was covered in the paper mache glue made it really hard to stick.
Once several layers of cloth were placed on the base, and as many as would stay up were on the branches, we moved to using actual newspaper on the project. Newspaper was also much easier to use in the small space the ends of the branches because it was thinner.
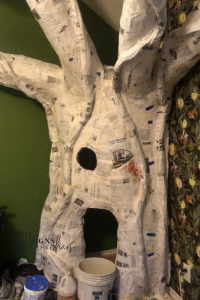
After placing the paper mache layers on the tree project it looked a little flat. In order to give the effect of bark on the tree trunk feel we spread another layer of joint compound on it.
Now keep in mind this part was the longest part in the entire process. Between each layer we had to allow for time to dry so that we weren’t just adding glue to glue and so that it didn’t drip. Since we took our time though, it was solid, stable, and really has the visual impact of a tree!
Paper Mache Vines
We wanted to add some visual interest to the tree. We didn’t want it to be just a huge brown blob so we decided to add some vines into the paper mache process. By twisting the paper into cylinder shapes and then using paper mache to attach them to the tree it really added some depth to the project.
This is also how we helped make a seam on both sides so the tree blends in smoothly with the wall.
Painting the Tree
Y’all, paint is expensive and we were going to need so much and many coats to cover all the paper mache. We went with an economical version and are so glad we did.
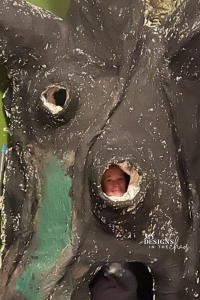
In order to give it a dark consistent base we added one full coat of black to the entire tree trunk and branches. In hindsight I’m not sure if we would do that again because it was difficult to get it back to a lighter brown and green, but it did give us a consistent backdrop for the next layer of paint.
For the paint we combined some white to create different tones of brown, shades of green, and added a few highlights in the main base of the trunk.
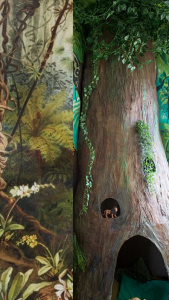
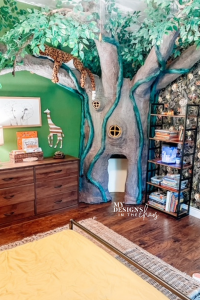
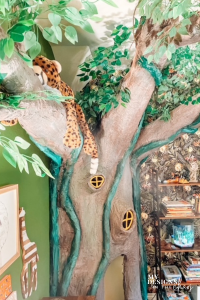
Because the trunk of the tree is such a huge focal point in the room we wanted it to have some visual interest in addition to the vines. This is also why we added the windows and little peep holes as well. Painting them with a pop of yellow in the end really helped to bring out the yellow mustard colors from the mural on the opposite wall.
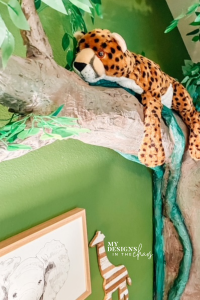
Adding the leaves
Now that the base was complete, it had been covered in paper mache, and even painted the color of a tree, it was time to add leaves. For me this was the most exciting part of the project because it transitioned the tree from looking like a huge brown trunk to an actual tree in a jungle.
We grabbed this bundle of leaves and were ready to bring the paper mache to life. We used a drill to make tiny holes in the paper mache. Then we poked in the leaf stems. In some spots we could poke them in far enough where no additional adhesive was needed. In some spot additional tape was required.
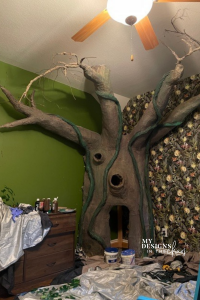
Once the leaves were attached, some spots needed another layer of paint over the tape. That wasn’t too tricky. It had finally come together and looked like a tree!
Finishing Room Touches
We now had to clean the paper mache tree project mess up and put the room back together. It was my goal to have his room totally finished and ready by the time school started. We made it just by a couple days!
I did end up also snagging a couple other elements for the jungle room makeover listed below:
- Egg chair
- Jute Rug
- Tiger Rug
- Blinds
- Mustard comforter
We already had the bookshelf, dresser, bed, plants, lights, and baskets. The two nightstands were from my grandparents and it was super special for me, to get to use them in this space.
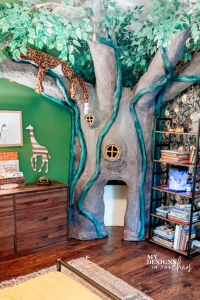
Final Jungle Room Photos
Let’s take a peek at the finished room!
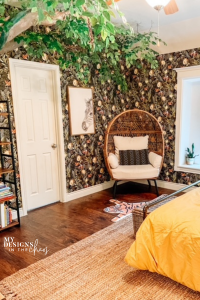
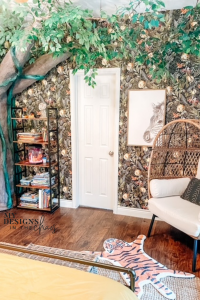
What an amazing space! That paper mache tree really takes the cake.
As always, as with life, there are things in the future that could be continued to be upgraded in the space. Maybe a new nightstand lamp, or even a few more plants, but for now I’m absolutely in love!
And most importantly he adores it. It is the perfect jungle get-away and the main star is by far the paper mache tree!
Pin this for later:
If you have little ones that love animals like mine do head over and check out this post:

17 Comments
Leave a Comment

Learn to develop, and grow your crafting skills!
My mission is to develop, encourage, and grow your crafting skills, and confidence through freebies, tutorials, our club, and our signature course.

Behind the Chaos...
My name is Michelle and I am the creative director behind the chaos. I'm so are glad you are here and hope you find inspiration and confidence to create something beautiful out of the chaos in your craft room and in life.
free ebook!
Bring your creativity to life quickly and easily.
This guidebook will give you a detailed look into the creative crafting cycle called the Craft Maker Process.


Just beyond words! I LOVE IT!
Thanks! It’s so awesome!
What a beautiful project , living space for your son, and memories of his childhood space. You are so creative Michelle.
Thank you!
This was truly a magical place for the children to have. You are so amazing! All the work you do is quality and time consuming. Super Woman!!!AKA Super Mom!!
Aww. Thank you!
That is absolutely remarkable. You son is one lucky kid.
Thanks so much!
This room is awesome; I can understand why you are proud of it. The best reward is that your son loves it! I would have loved a room like this as a kid, and I wasn’t even a jungle fan especially–except when Lion King was on at the movies, lol!
100% that is the best reward! 🙂
Loved reading how you achieved this amazing room for your son. I am sure your son will always love you for giving him this special room. You are wonderful parents and thank you for sharing how you did it all
You are so sweet! Thank you and glad you enjoyed it!
How many bundles of leaves did you end up using? Love this idea!
She used 5 bags of leaves (100)
What was the ratio of joint compound: wood glue: water you used for the fabric attachment, please?
Brilliant Brilliant Brilliant absolutely fabulous.
Thank You!