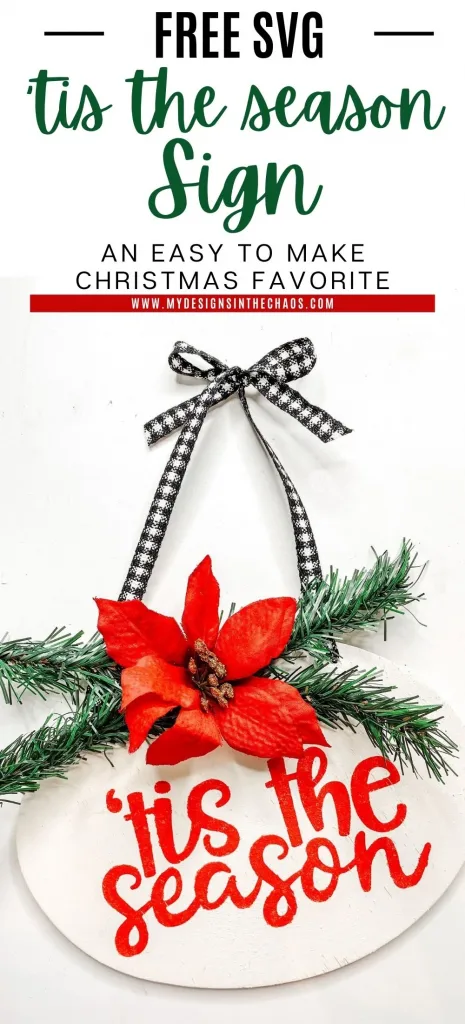
This ‘Tis the Season Sign is a Christmas Favorite: Learn How to Make it Today
share on social:
It’s always a good time to make holiday projects, and this ‘Tis the Season sign will add a nice touch to any holiday decor.
Every single day for a week we went live with Christmas in July projects. It was all part of the weeklong open doors event for Club Chaos.
Our doors open just twice a year, so if they’re not open when you watch this project video, don’t worry!
You’ll get another chance to join our crafty sisterhood.
Club Chaos is a community where your crafty peers are there to cheer you on, celebrate your wins, and encourage you to create.
The thing about this week of projects is that we’re using the same design in different ways.
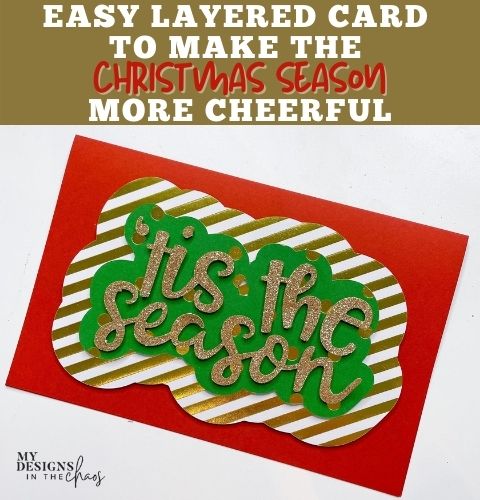
So far, we made a cute mixed-media ‘Tis the Season canvas with paper and adhesive vinyl, and then we made an adorable ‘Tis the Season card with a 3-D look that would make anyone’s holiday special.
Using the digital files we have instead of just collecting them is part of our focus in the Club too.
Today we are going to be creating a ‘Tis the Season sign and we’ll be using stencils and painting.
If you want to do something different though, you could use adhesive vinyl or even heat transfer vinyl.
You can watch the project video if you want to see how we made it.
Supplies and Tools for our ’Tis the Season Sign:
- ’Tis the season svg file
- White and red chalk paint (or other kind of paint in your choice of Christmas colors)
- Foam brush
- Oramask 813 (stencil vinyl)
- Weeding tool
- Transfer tape
- Greenery or ribbon to make a bow
- Hot glue gun and glue
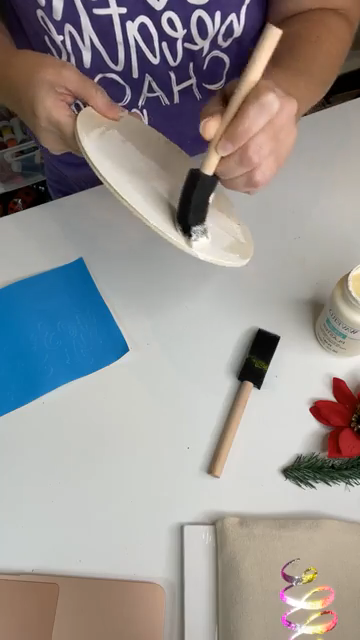
Step one
Take the hanger off the sign and paint the background white. If you’re going to see the back, make sure you paint that too.
Depending on the color you’re using, like white, it’s not really noticeable if you don’t paint the edge.
Step two
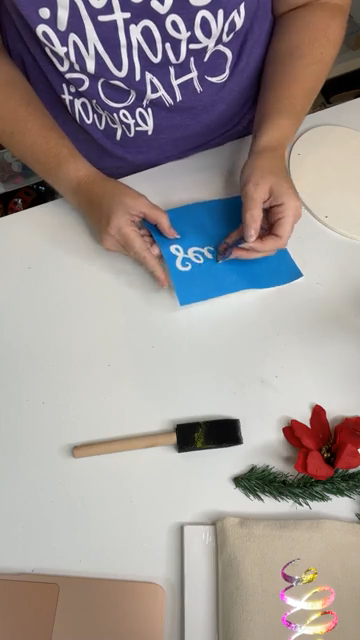
Cut out ’Tis the Season on the stencil vinyl and remember not to mirror it.
Since we’re painting our design, we want the stencil to look how we want the finished project to look.
Peel all the letters, all the parts of the design that you want to paint.
Use transfer tape to place your stencil onto the sign. It’s okay if there are bubbles in your tape, but you don’t want any bubbles in the stencil.
And make sure your sign is completely dry before you place the stencil.
Remove the transfer tape carefully, peeling it back on itself slowly.
Extra tips from Michelle:
- Stencil vinyl is a lot different from regular vinyl In several ways. It is thinner and it’s a little bit see-through. Because it is a bit thinner, it tears easier, which makes it easy to peel off when you’re finished painting.
- Chalk paint dries a little faster than other paint. You can also use a heat gun or hair dryer to help it dry faster.
- You can always add another piece of stencil vinyl around the edge if you think you may be painting too close to it.
- Sanding your piece of wood first can also help prevent the paint from bleeding.
- Do not mirror your stencil when using it to make a sign
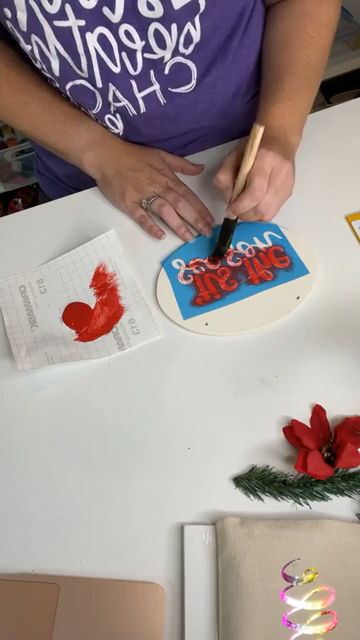
Step three
Use your fingers and press down all the little edges of the stencil.
Dab your foam brush into the paint and tap off any extra before dabbing your brush into all the parts of your ’Tis the Season sign design.
Dabbing into the stencil instead of brushing across it will help keep the paint from bleeding.
It’s totally up to you how thick you want the paint to be, but start thin because you can always add more.
Sign making tips from our crafty viewers
- Use mod podge as the first layer, before painting the sign, so that the stencil paint doesn’t bleed.
- Paint a light layer of the background color first before painting your stencil color
- Use a stencil on canvas to make another type of sign/artwork
- Make sure to take your time when painting your stencil
Step four
Peel off the stencil.
If peeling it off pulls off some of the paint, you could use a piece of the stencil vinyl to do the same thing on the other parts of your sign and make it all have a rustic look.
Use your weeding tool to pull out the insides of the letters.
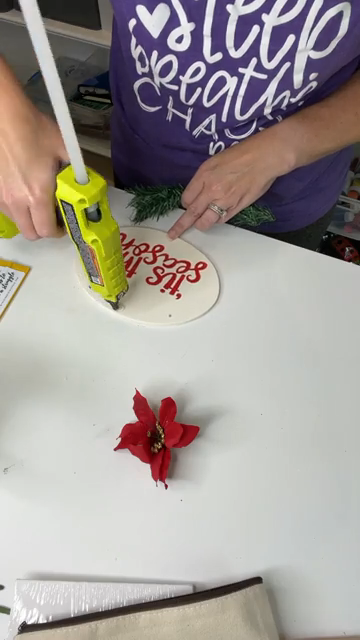
Step five
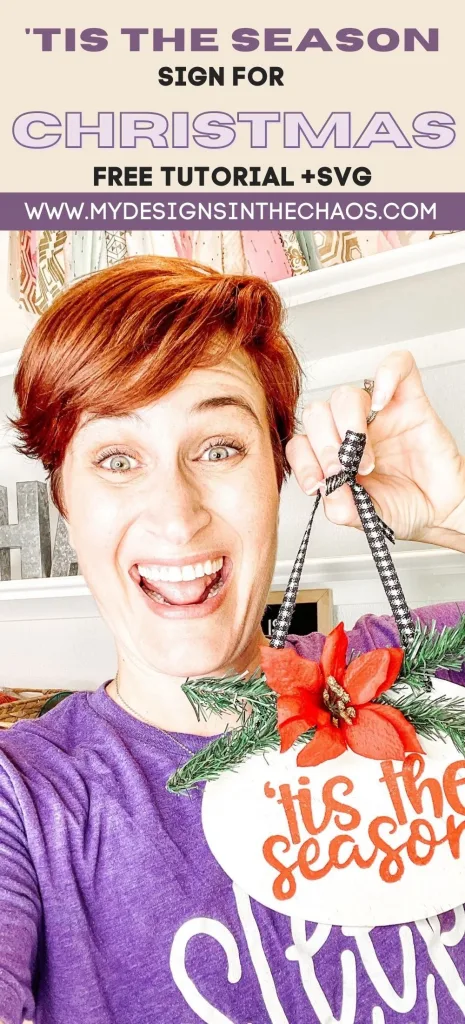
Use a hot glue gun and attach your greenery, a cute little poinsettia flower or bow, or whatever you want to use to decorate your sign.
Reattach the string hanger that came with the wood sign, or use a coordinating piece of ribbon.
It’s one of the many ways you can personalize a project and it’s one of the things I love most about Club Chaos.
You can see the same project done in so many different ways, and they all look great.
With just a few easy steps, we took a wood sign, painted our ‘Tis the Season design, and created a sweet little Christmas sign perfect for any holiday decor.
If you liked this ‘Tis the Season sign you may also like:
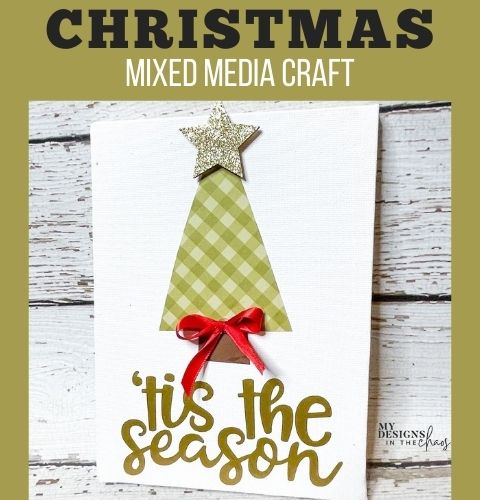
Head on over the day 1, Fun & Easy Christmas Mixed Media Craft , to download the free ‘Tis the Season svg
If you love crafting with others, if you love getting tips and encouragement from your crafting peers, and if you love actually using all the digital files you collect, we hope we’ll see you in the Club!
And join us on Facebook for Make It with Michelle Mondays for more fun projects.
WANT TO REMEMBER THIS ‘TIS THE SEASON SIGN TUTORIAL? PIN IT FOR LATER!

Learn to develop, and grow your crafting skills!
My mission is to develop, encourage, and grow your crafting skills, and confidence through freebies, tutorials, our club, and our signature course.

Behind the Chaos...
My name is Michelle and I am the creative director behind the chaos. I'm so are glad you are here and hope you find inspiration and confidence to create something beautiful out of the chaos in your craft room and in life.
free ebook!
Bring your creativity to life quickly and easily.
This guidebook will give you a detailed look into the creative crafting cycle called the Craft Maker Process.