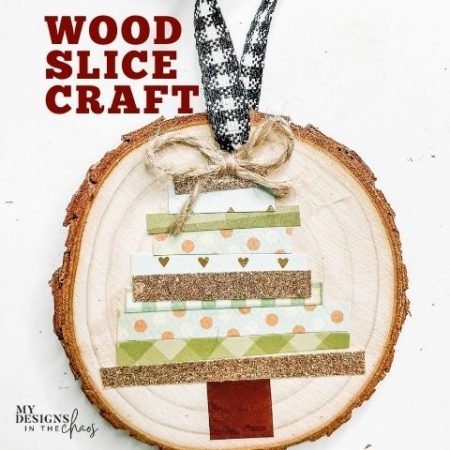
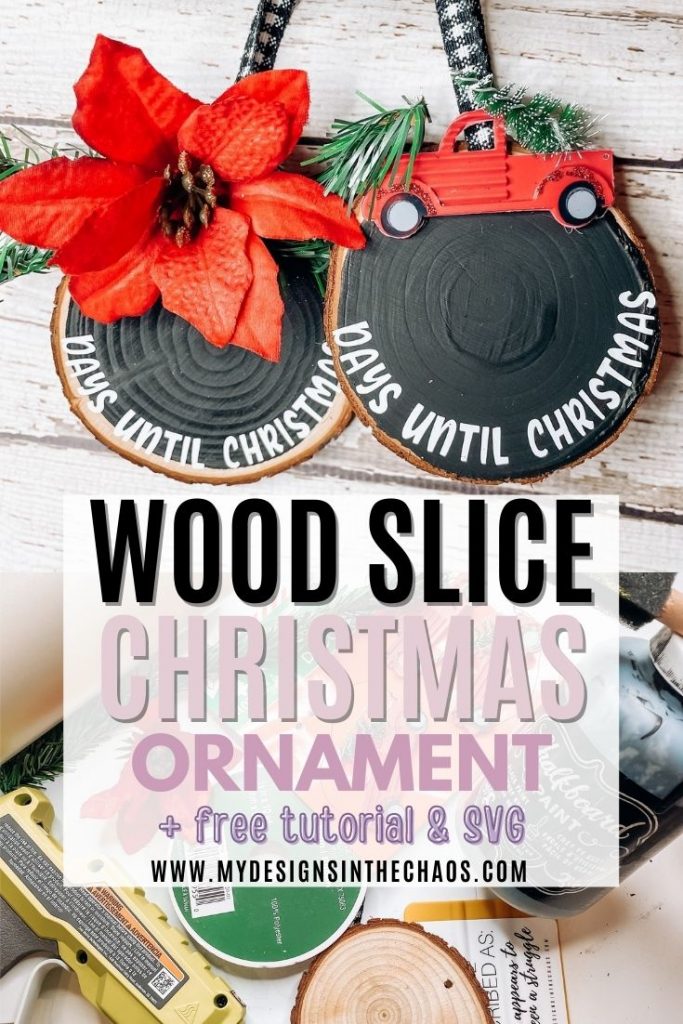
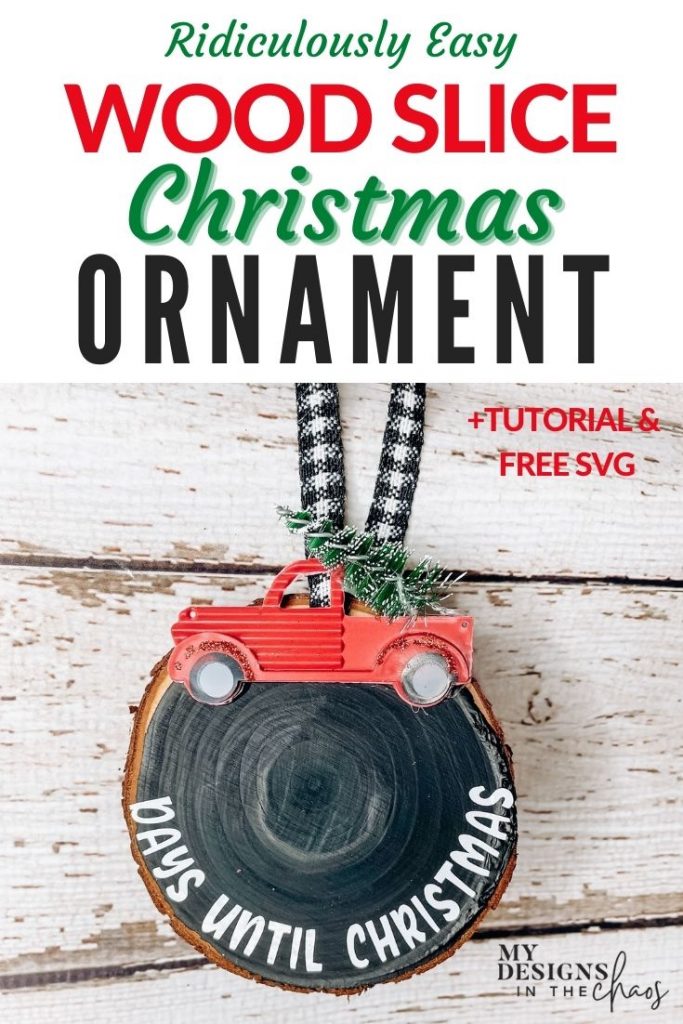
How to Craft a Wood Slice Christmas Ornament
share on social:
When you order wood slices, they come in a big bag. I make a few ornaments and then start to wonder if I really need more of the same exact wood slice Christmas ornament.
So what I want to do is give you all kinds of ideas for how to use these wood slice ornaments and how to make them unique.
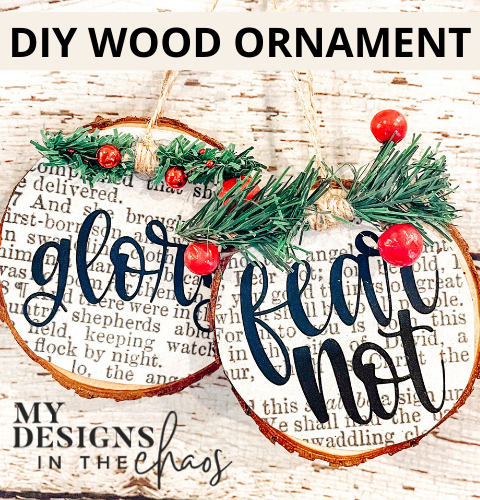
Our Make It with Michelle project last week featured a DIY wood slice ornament using scripture and “glory” or “fear not” in vinyl across the verse.
This week we are going to make the cutest little countdown calendar.
The “days until Christmas” design file is the freebie svg for this week’s project.
If you missed the live Make It with Michelle Monday video, you can catch a replay:
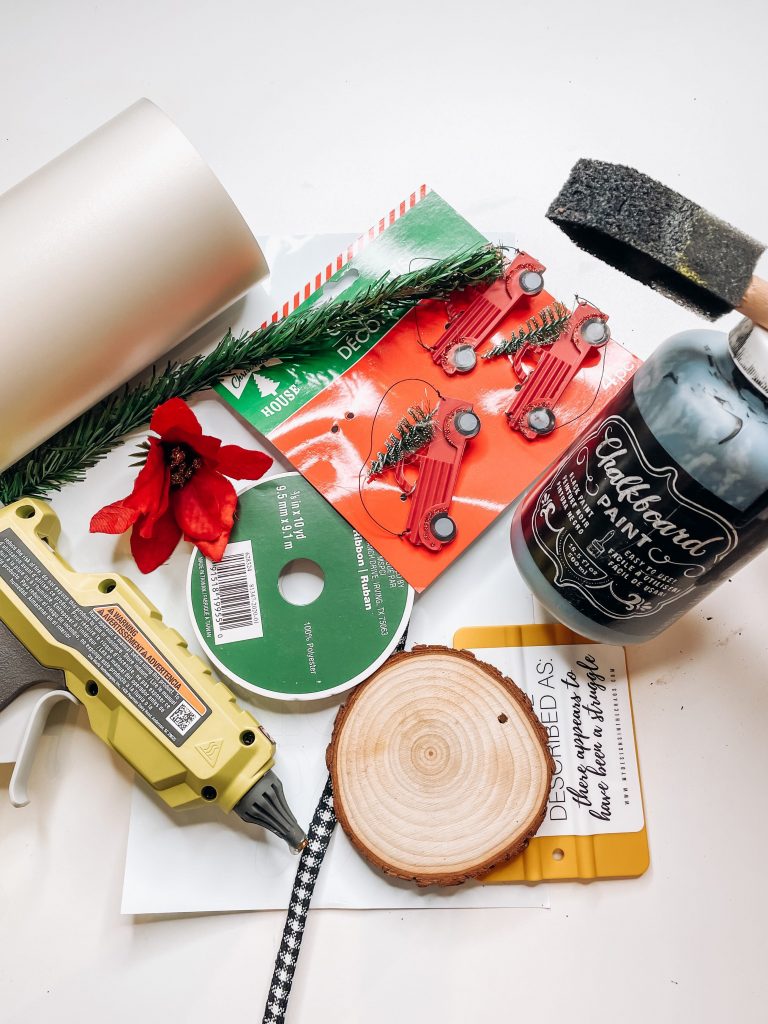
Supplies and tools we’ll be using for our DIY Wood Slice Christmas Ornament:
- Black chalkboard paint (not chalk paint — chalkboard paint)
- Permanent adhesive vinyl in white
- Ribbon or twine
- Christmas ornament or other decoration, like greenery, for the top of the wood slice (I used a cute red Christmas tree farm truck)
- A small nail or some tape (optional)
- Hot glue gun and glue
Avoid shiny object syndrome!
One of the things I think is so important is to use the supplies we have.
We all get shiny object syndrome, even me!
We feel like we have to go buy all the things, all the latest and greatest, and sometimes we forget about all the awesome things we already have in our craft space!
What happens is that we get all this stuff and we make one project with it.
Then we have a big stash of leftovers and we don’t know what to do with them.
The project, and the challenge that comes with them, is putting your own spin on a design and how you can make it unique.
And that’s what we try to do in our five-day challenges with My Designs in the Chaos.
It’s a chance to make new, quick projects and make them your own by adding your unique touches.
We have them periodically, so keep an eye on our website and social media for your next chance to join!
Step one:
Paint a circular background on the wood slice. And remember, we’re using chalkboard paint, not chalk paint.
It’s totally up to you if you want to paint all the way to the edge.
I like to leave a little soft edge so you can see the natural wood a little, and I used soft pressure around the outside of the circle to make that soft edge.
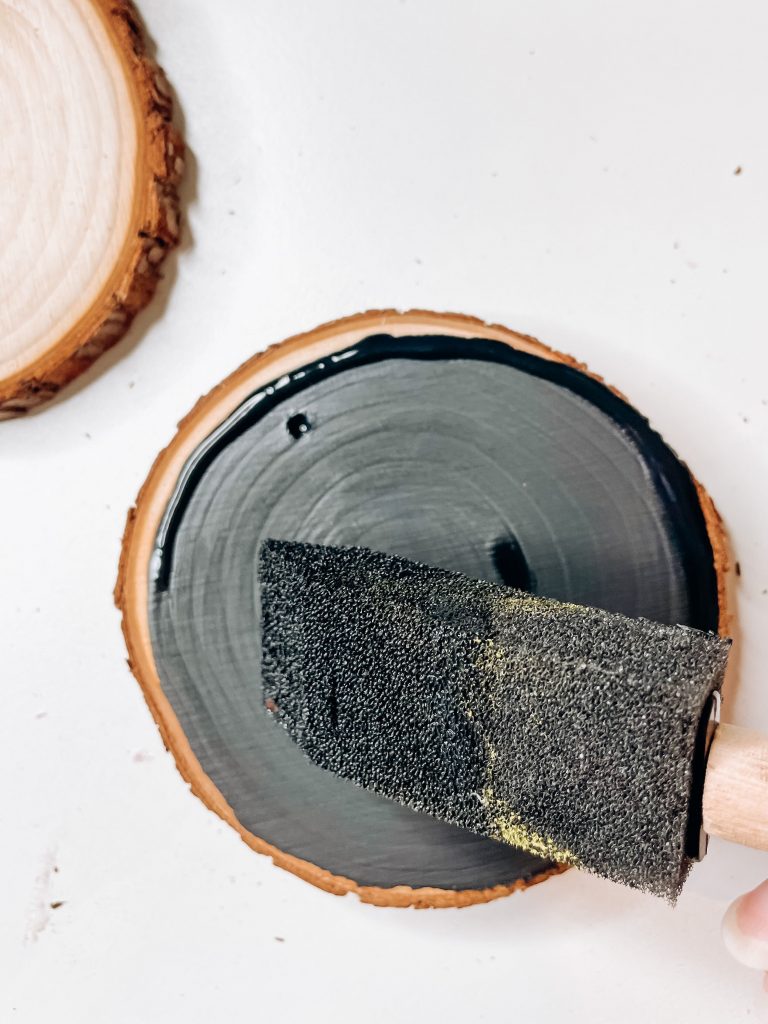
You can leave the hole at the top open so that you can hang your wood slice Christmas ornament, or you can cover it up and display it on a shelf or table.
Remember, on all of these projects, the challenge is to make it the way that you want it to look so it is something that you enjoy.
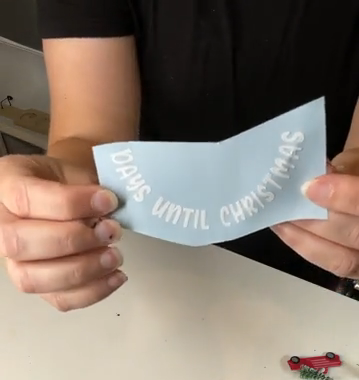
Step two:
I made the design as generic a size as I could, but since all wood slices are unique, you might need to adjust the size a little for your ornament.
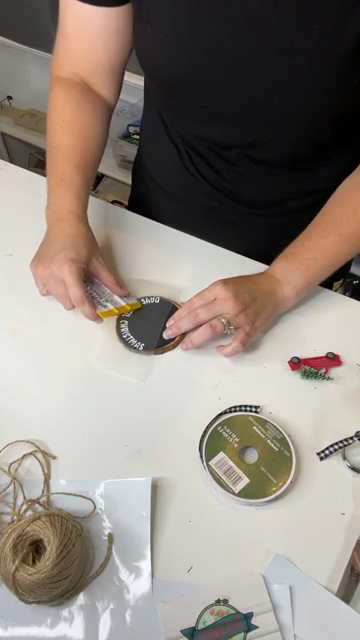
Cut out your vinyl and weed your design (take off all the vinyl that you won’t need for the ornament). Cover the design with transfer tape and trim off the extra.
Make sure the paint is completely dry before you try to attach the vinyl.
If you’re impatient like me, you can use a heat gun or a hairdryer to help it along a little faster.
Step three:
Before you place your vinyl, make sure the circle is aligned at the top. I like using clear transfer tape so I can see exactly where it’s going.
Use your scraper if needed to make sure everything is smooth, and then slowly peel off the transfer tape.
There is no big rush to peel it all off at once.
You can use one hand to peel the tape and one hand to help hold the design down.
Step four:
Cut your ribbon or twine and use a small nail to help poke the ribbon through the hole.
You could also use a small piece of tape around the end of the ribbon and that would help poke it through the hole too.
Tie a knot with the ends.
I trimmed off the extra pieces around the knot, but you could make this into a bow and let it be part of the decoration.
If you want to hide the knot, just move the ribbon around through the hole until the knot is hidden in the back of the wood slice.
Step five:
Use a little hot glue to attach your ornament to the top of the wood slice.
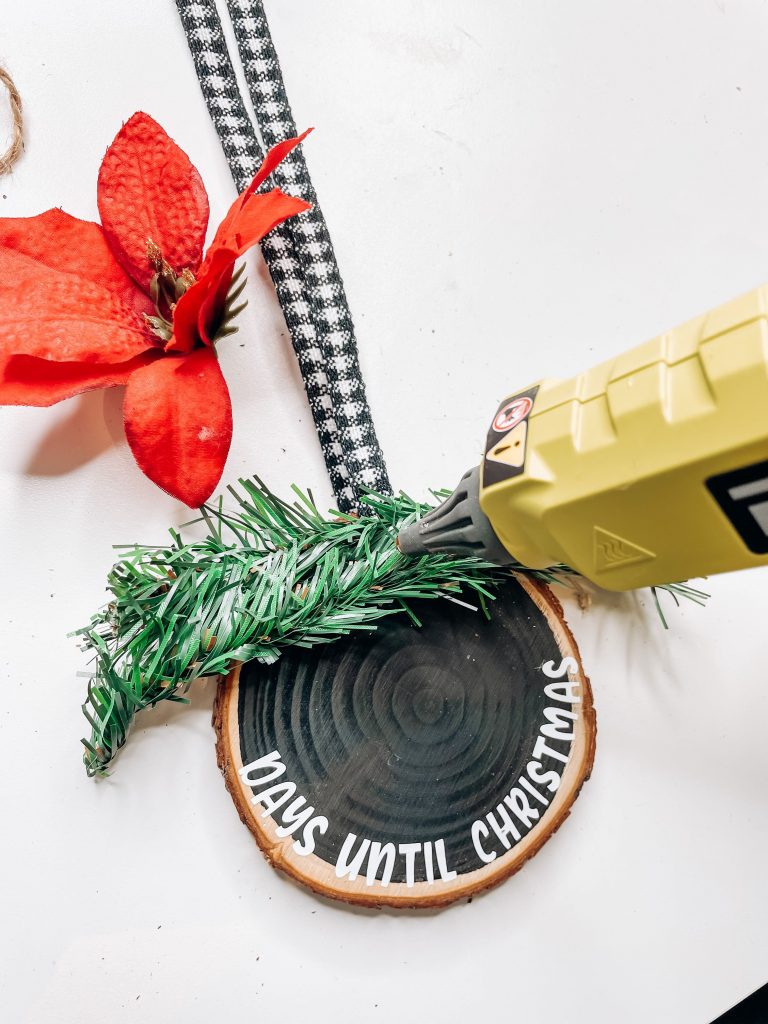
Or you could use greenery, a silk poinsettia flower, or any Christmas decor that you like.
Kids will love these ornaments, and they’ll love changing the numbers every day and counting down to Christmas.
A wood slice Christmas ornament makes the perfect (and super easy) holiday gift.
In just five easy steps, with a little chalkboard paint, our “days until Christmas” vinyl design, some ribbon, and decoration, we’ve made an adorable countdown to Christmas wood slice ornament.
Please remember that there is no wrong way to craft and don’t be afraid to put your own stamp on these projects.
I would love to see what YOUR finished ornaments look like!
It’s always fun to see what everyone comes up with to make their own versions of the project.
At My Designs in the Chaos, our goal is to develop, encourage, and grow your crafting talents and confidence.
If you loved this project, please let us know and share it with someone else you think would have fun making these countdown to Christmas wood slice ornaments.
Download the “Days Until Christmas” free SVG
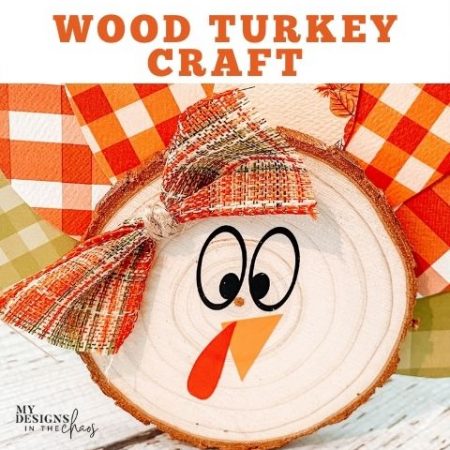
Love this Wood Slice Ornament Craft? You May Also Love:
Did you love this wood slice ornament? Pin it for later.

Learn to develop, and grow your crafting skills!
My mission is to develop, encourage, and grow your crafting skills, and confidence through freebies, tutorials, our club, and our signature course.

Behind the Chaos...
My name is Michelle and I am the creative director behind the chaos. I'm so are glad you are here and hope you find inspiration and confidence to create something beautiful out of the chaos in your craft room and in life.
free ebook!
Bring your creativity to life quickly and easily.
This guidebook will give you a detailed look into the creative crafting cycle called the Craft Maker Process.