Easy-Breezy Wood Turkey Craft Every Thanksgiving Lover Should Make
share on social:
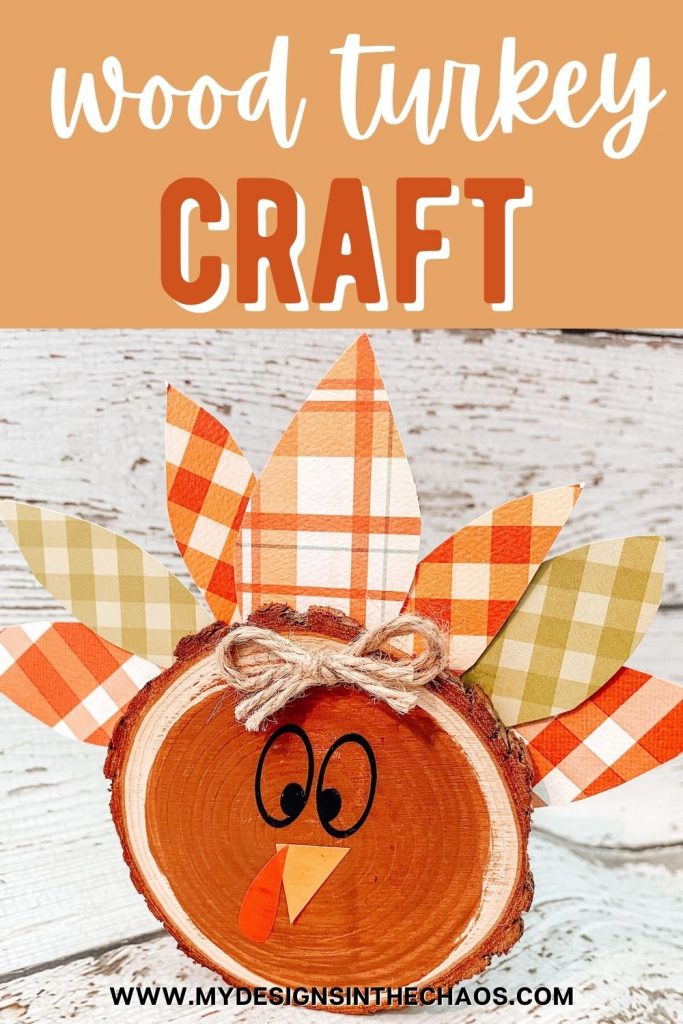
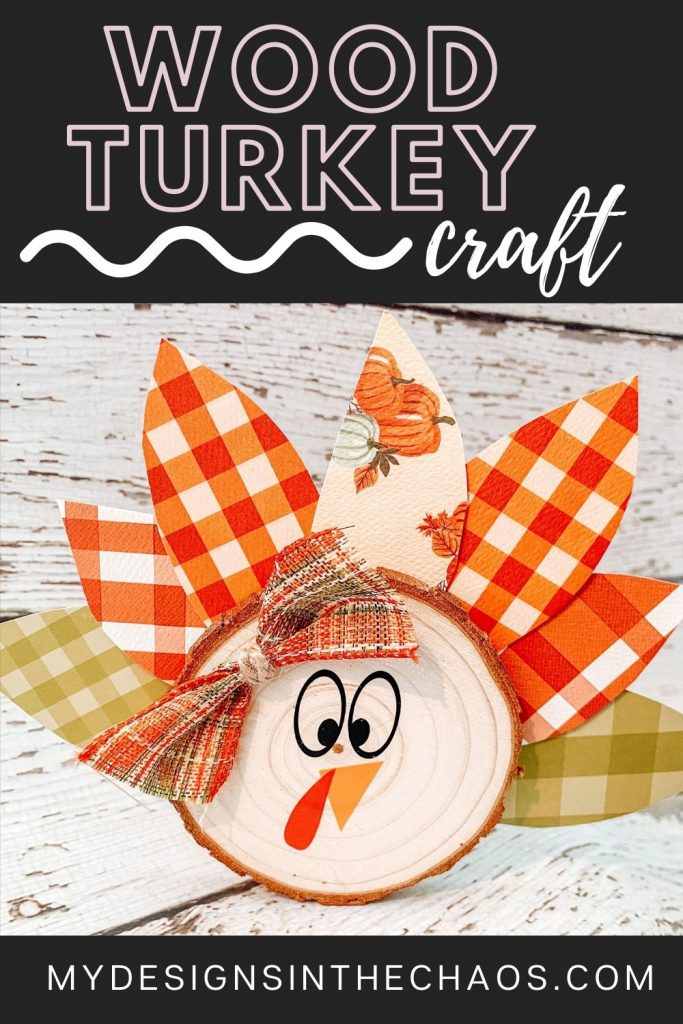
This simple wood turkey craft is just perfect for fall. It has all the fall colors and it’s one of the iconic Thanksgiving images.
We made this in the summer, but maybe making some fall projects will help us get to cooler temperatures, pumpkins, and leaves turning colors.
You could also paint an orange pumpkin on a wood slice to go with your turkey.
These wood turkey crafts would also make cute table settings or decor on your Thanksgiving table.
Add a name right onto the wood slice and it becomes a keepsake for all your guests.
When you watch this video, you’ll see I was wearing my birthday crown.
In our Club Chaos, when it’s your birthday month, you get an extra special bonus bundle and you get a crown that you can make.
So, of course, I had to wear mine for my special day too!
We have done so many wood slice crafts. The first one we did was the birth story on a wood slice to make a beautiful ornament.
Using a stencil, we made a snowflake with paint and glitter.
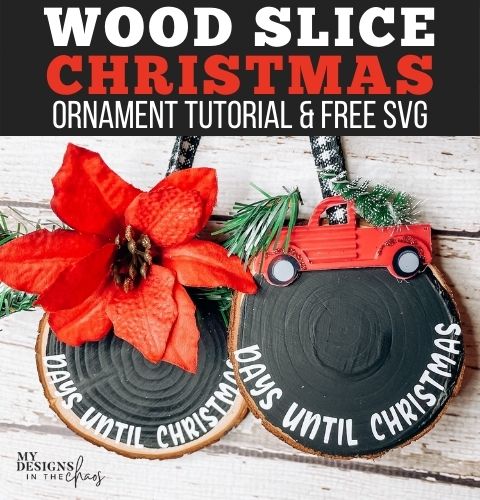
We also made the most adorable little countdown to Christmas ornament with chalkboard paint and greenery add-ons.
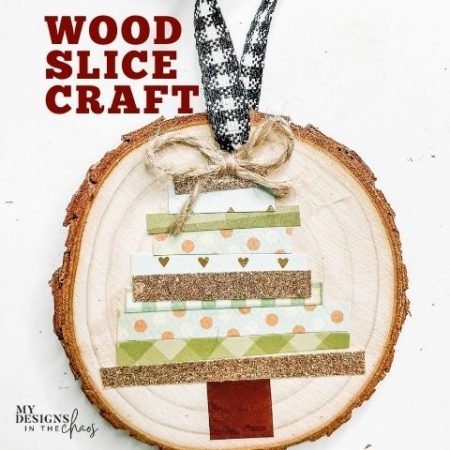
The last one we did was a Christmas tree with all kinds of colors and patterns.
Be sure to catch the replay here:
Supplies for our wood turkey craft
- Wood slice
- Adhesive vinyl in black, orange and red (or paint if you want to use the designs as stencils)
- Ribbon in fall colors
- Card stock in coordinating fall colors in solids, patterns, or both (for the tail pieces)
- Twine
- Hot glue and glue gun
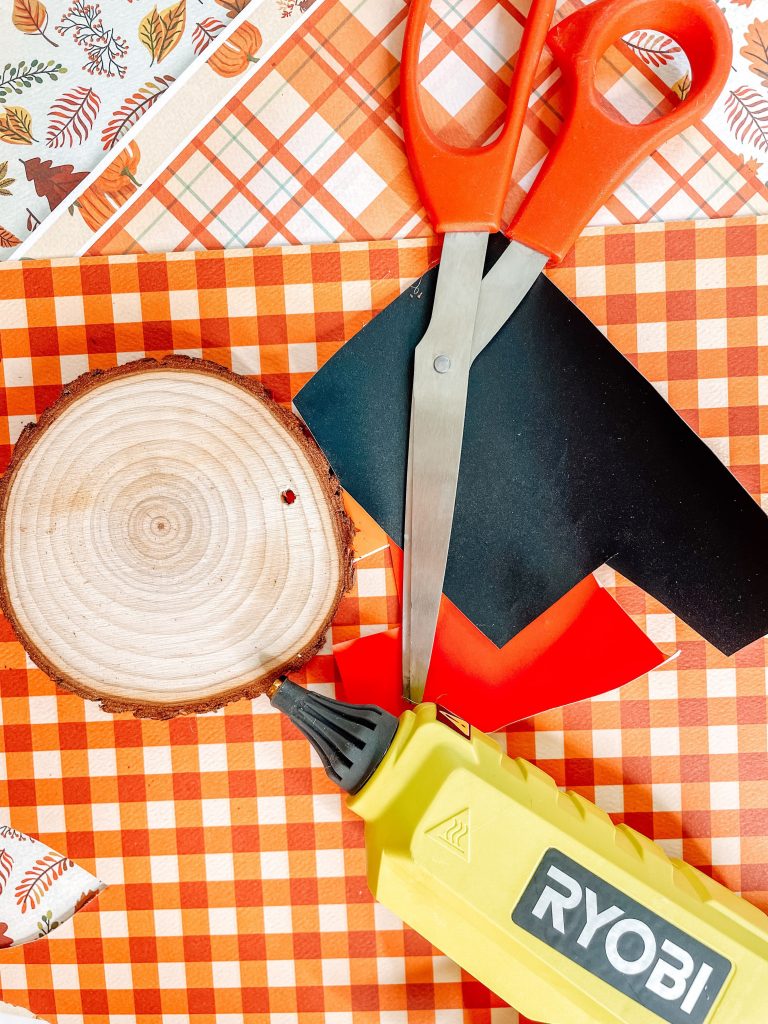
Step one
Paint a background color if you want or just use the natural color of the wood slice.
Use your craft machine to cut out all the face pieces of the turkey.
This turkey face is a freebie svg you can use for this project.
Adhesive vinyl will work great but you can also use paint if you want. I started with the eyes for her face.
If you line up the eyes with the hole in the wood slice, it will make it easier to add the feathers later. Then add the beak and waddle.
Step two
Cut a small section of ribbon and squeeze the middle together so that the ribbon looks like a bow.
Wrap a small piece of twine around it to hold it in shape. Seal the twine and ribbon bow with a dab of hot glue.
Use a dab of hot glue to attach the bow to the turkey at an angle.
She’s already beautiful, but we still have to add her tail.
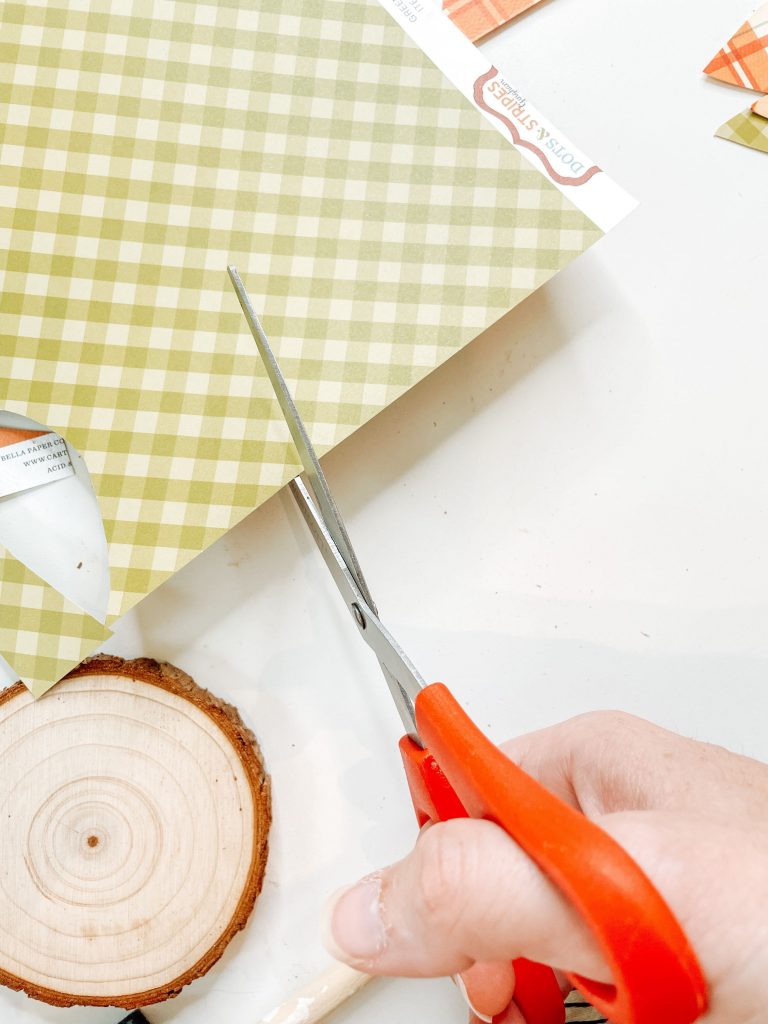
Step three
Cut out simple leaf-shaped pieces of card stock to make the feathers. Use your craft machine for this or just do them freestyle with scissors.
Make them a little bigger than you think you may need, in case you want to move them in tighter around the wood slice. You could also grab a pack of feathers to use too.
Make sure you have an odd number of tail feathers. We used seven for this wood turkey craft.
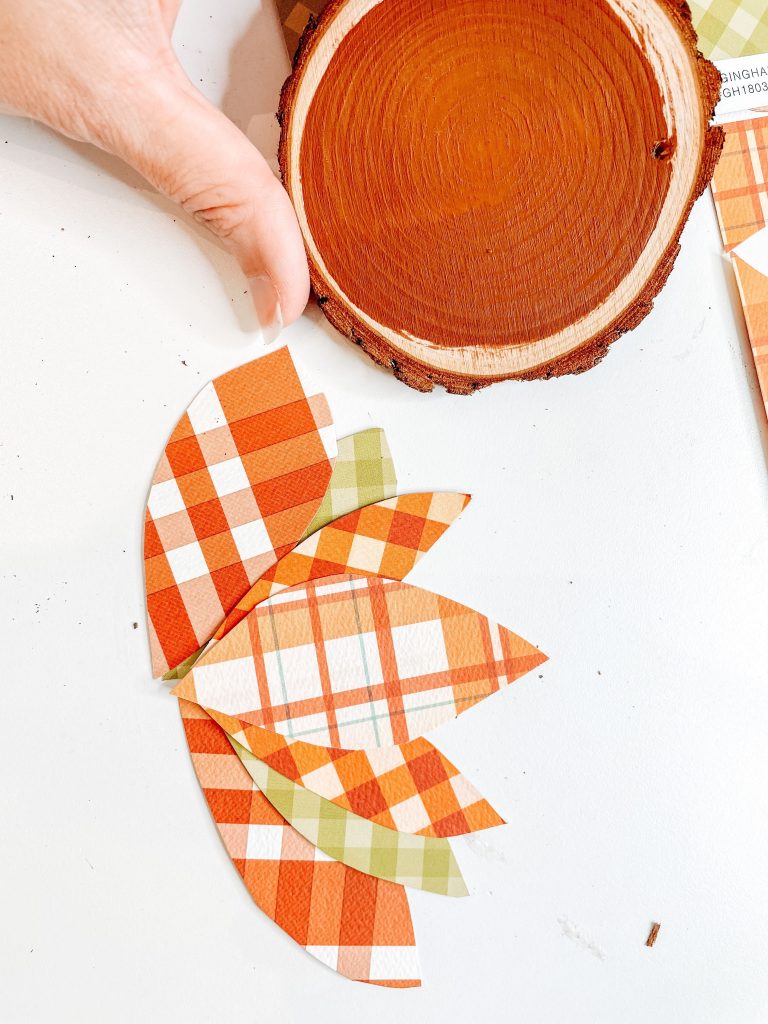
Step four
Arrange your feather pieces so you know what they’ll look like before you start gluing them down.
Flip the turkey over and make sure her face is lined up correctly.
You don’t want to put the feathers on the bottom.
Put some hot glue all over the middle of the back of the wood turkey craft.
Place the feathers around in a fan shape.
Make sure the feathers are spread out nicely. Add more hot glue if needed.
Last Step to Creating Your Wood Turkey Craft
Cut a circle out of card stock to place on the back to cover up all the ends of the feathers.
If you’re using this as a table decoration, you’ll want both sides to be pretty.
Also, cut out a strip of card stock to prop the turkey up so she sits on the table or wherever she’ll be perching.
Fold the strip in half lengthwise and then in half again on the short side.
Put hot glue on the fold and glue it vertically at the bottom of the back of the wood slice.
Now she will stand up and everyone can see all her beautiful fall colors!
This would be a great craft to occupy the kids before the meal is ready at your Thanksgiving get-together.
Just set up a separate area for them to be working and ask a teen or adult to supervise. Have templates ready for them to cut out the feather pieces.
Have the faces ready to put on the wood turkey craft too.
Another idea is to put a different word on each one of several turkeys.
Each one could have a different word of something we are grateful for, such as: family, health, love, new beginnings, the name of a new baby, the date a couple was recently married, etc.
Show off your wood turkey crafts — we’d love to see them.
In My Designs in the Chaos, we believe in Community over Competition.
So when we say we want to see your projects, we mean it! We want to celebrate your wins with you.
The whole goal behind My Designs in the Chaos is to inspire you to bring your ideas and your inspiration to life, and to put your own twist on all these projects we do. So let’s get crafting.
Don’t forget to grab your free turkey face svg!
You Might Also Like:

Want to remember this wood turkey craft for later? Pin it now!

Learn to develop, and grow your crafting skills!
My mission is to develop, encourage, and grow your crafting skills, and confidence through freebies, tutorials, our club, and our signature course.

Behind the Chaos...
My name is Michelle and I am the creative director behind the chaos. I'm so are glad you are here and hope you find inspiration and confidence to create something beautiful out of the chaos in your craft room and in life.
free ebook!
Bring your creativity to life quickly and easily.
This guidebook will give you a detailed look into the creative crafting cycle called the Craft Maker Process.