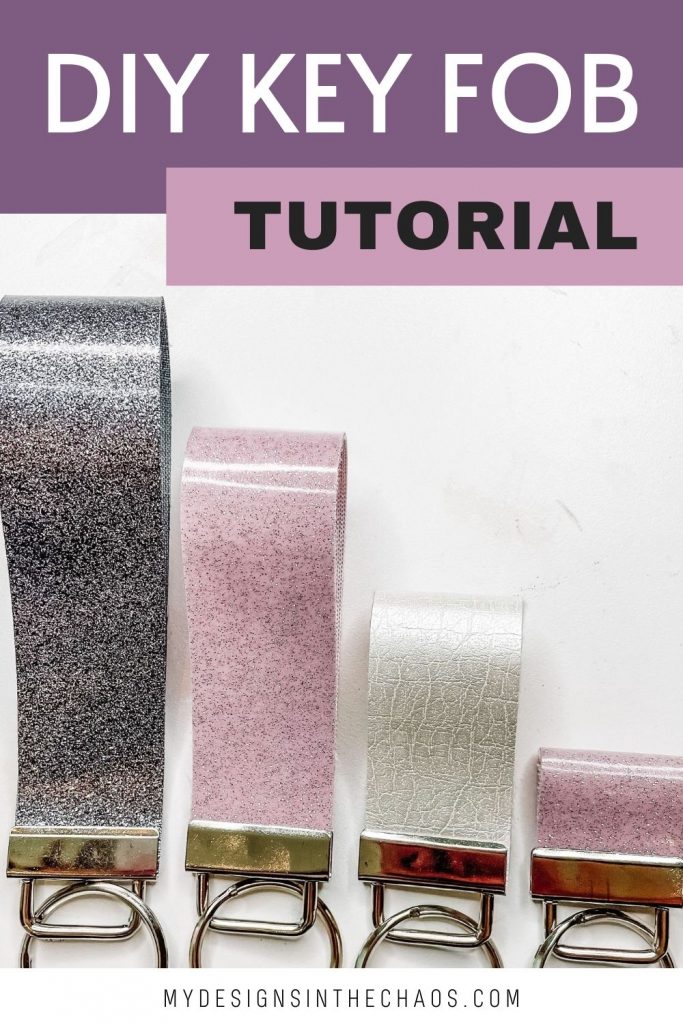
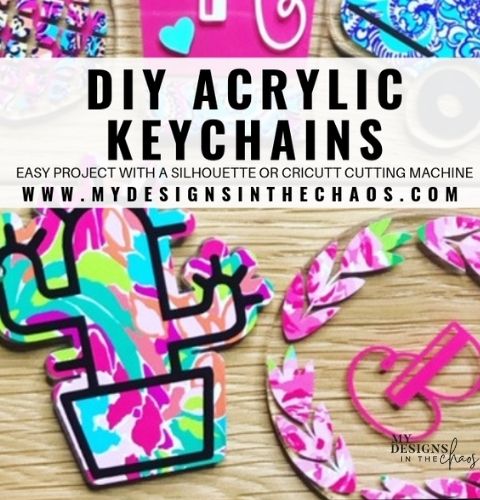
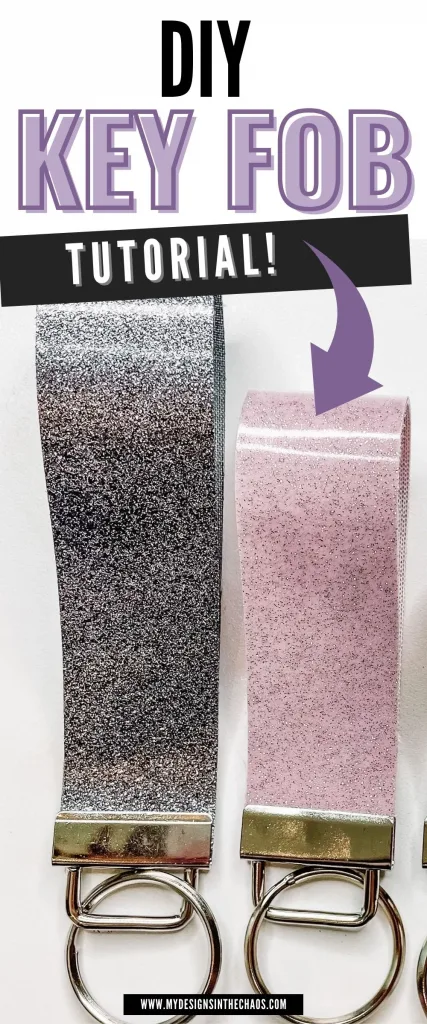
Unbelievably Easy DIY Key Fob Tutorial to Make Your Own Wristlets
share on social:
This easy DIY key fob is something even those newest crafters will feel comfortable making.
It’s going to be super quick and super easy and I know you are going to love it.
You all voted on our Instagram stories for what color to use, and none of us should be surprised that sparkly pink won!
Make these DIY key fobs with tools specifically made for this purpose if you want, but
I’m going to show you how to do this with tools you probably already have.
When we want to start a new type of craft or project, it’s always a good idea to see what we have on hand that will work instead of just rushing out to buy new things.
Sometimes a visual can help when we’re learning to make a new craft, so check out the Facebook live video if you want to watch how it’s done.
Supplies and tools to make the vinyl key fob
- DIY key fob svg
- Canvas vinyl (not adhesive or heat transfer vinyl)
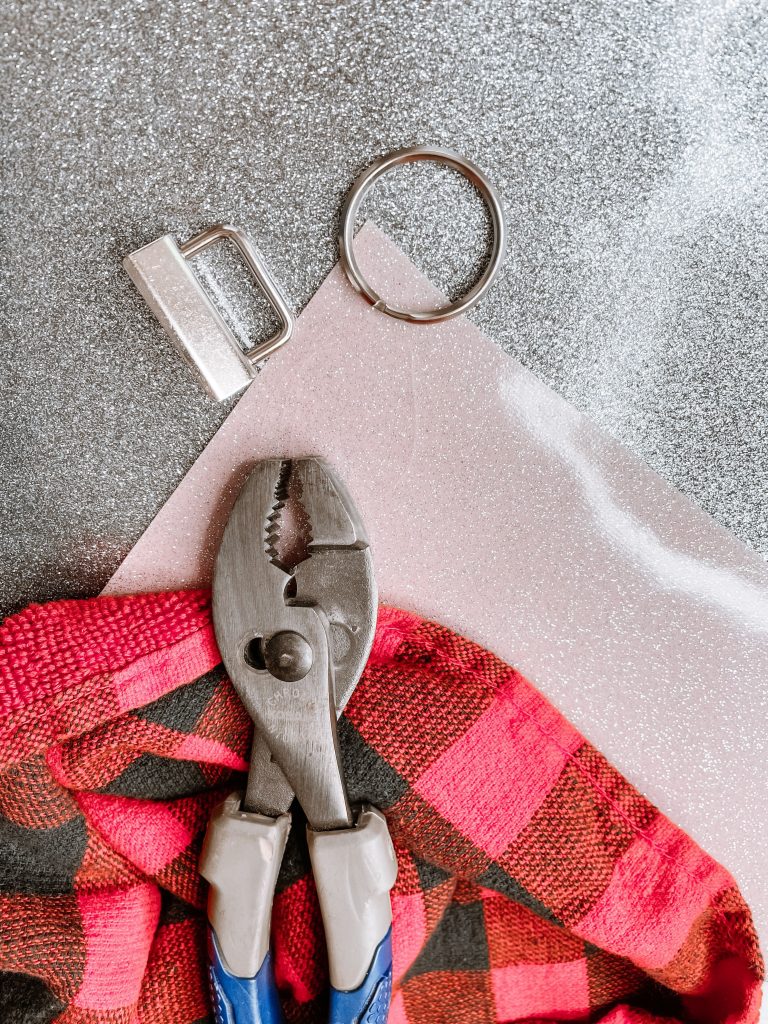
- Key fob toppers (and tool)
- Pliers and a towel, or specialty pliers with rubber coating over the metal, which will protect the key fob topper.
- Fabric scissors
Step one
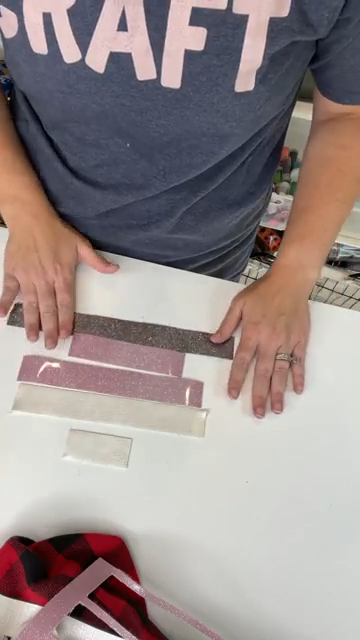
Lay your vinyl on your cutting mat to cut, and after it’s done cutting, flip the mat over and peel off the vinyl.
There might be some spots that stick but because canvas vinyl is a bit thicker, you can pull it a bit.
Just use the same piece if vinyl if you want to make a whole bunch at once.
You may have to cut a couple of times to make sure it cuts well.
Use fabric scissors to cut any little extra pieces of string off the sides.
What size should I make?
With this svg file, you can really do any DIY key fob size you want.
The svg file has a few to choose from.
There is a full-length one, and two more in the middle, and a tiny one.
If you want your fob to go all the way around your wrist, you’ll want to use the largest size because it’s the wristlet size.
The tiny one is just so sweet. It would be a really cute addition to a lanyard for anyone who has to wear keys.
You should also keep in mind what size toppers you have for your vinyl key fob.
You’ll want the width or the vinyl key fob to match the width of the topper hardware.
Let’s talk tools
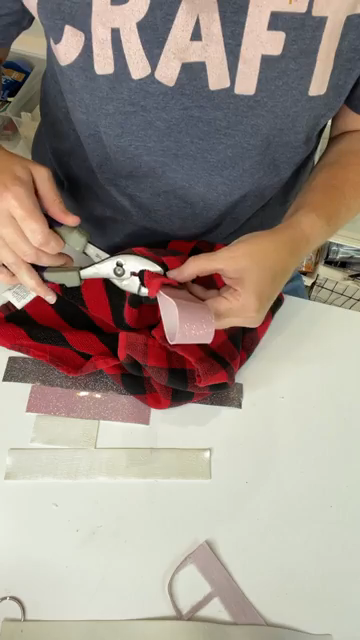
I just used a regular pair of pliers to work with the key fob toppers.
I also used a towel too to protect the key topper from getting scratched by the pliers.
But you could get a pair of pliers specifically designed with rubber coating to protect the key fob topper or another piece of metal you’re working with.
It just depends on what you have.
Step two
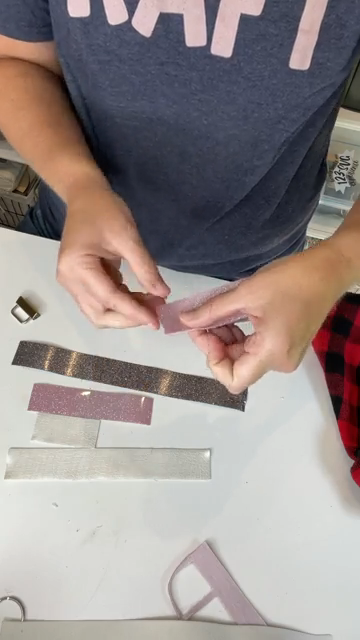
Fold the canvas vinyl key fob strip in half, and again, make sure that any little stray pieces of fabric are trimmed off the side.
Then we have a few options. You can leave it as is and not do anything to the loose ends.
Or, you could add a little hot glue or even stitch them together.
Place the topper on the loose ends and center it.
Make sure the ends are all the way in the key fob topper too so that it will make a good, strong hold when closed.
Step three
Take the towel and wrap it around the topper and then use the pliers to close the topper over the ends of the vinyl key fob strip.
Flip the topper over and do the same thing on the other side.
Do this on both ends of the topper, where the spikes are.
Make one final pass with the pliers across the top to make sure it is sealed.
Don’t forget to keep using the towel as a protective layer between the pliers and the topper.
Add the keyring and your DIY key fob is finished!
Simple is key (fob)
This is such a simple project and it’s easy to make these vinyl key fobs in mass quantities.
You could make them for Christmas gifts for everyone in the office or you could use them in your business as a small thank you or an incentive to upsell to a certain dollar amount.
To make it even more special, add another, skinnier layer of canvas vinyl to the vinyl key fob, or even a ribbon.
Another option is to personalize with adhesive vinyl.
Be careful about trying heat transfer vinyl though since the canvas vinyl has a shiny surface.
Heat might melt the surface of the canvas vinyl so just test it first.
So who do you think you’ll make these for?
Your teenage kids, your best girlfriends? Maybe you’ll just make one for yourself first?
We’d love to see what canvas vinyl you use and how yours turn out.
Share pictures with us in our Facebook group so we can connect and see what you are creating. Then, don’t forget to vote on Instagram to help select our weekly projects.
We’ll see you live on Facebook for Make It with Michelle Mondays!
Download the DIY Key Fob file here!
You May Also Like:
WANT TO REMEMBER THIS? PIN IT!

Learn to develop, and grow your crafting skills!
My mission is to develop, encourage, and grow your crafting skills, and confidence through freebies, tutorials, our club, and our signature course.

Behind the Chaos...
My name is Michelle and I am the creative director behind the chaos. I'm so are glad you are here and hope you find inspiration and confidence to create something beautiful out of the chaos in your craft room and in life.
free ebook!
Bring your creativity to life quickly and easily.
This guidebook will give you a detailed look into the creative crafting cycle called the Craft Maker Process.