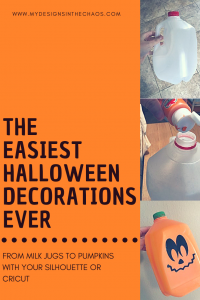
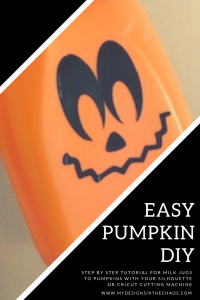
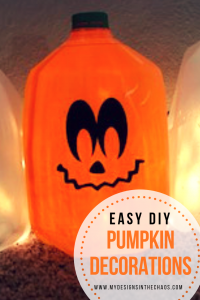
Easy Halloween Pumpkin DIY
share on social:
This pumpkin DIY is seriously the easiest decor that you can make for the Halloween season. They are SUPER cheap, cute, and the kids (or you) will have fun creating them. Let’s walk through the steps together or if you are more visual scroll down to watch the video.
Please Note: There may be affiliate links in this post and at no extra cost to you we earn a small commission when shopping through our links.
SUPPLIES
Empty gallon milk jugs
*If you would like ghosts instead of pumpkins or want to use orange lights instead of paint start on step 3*
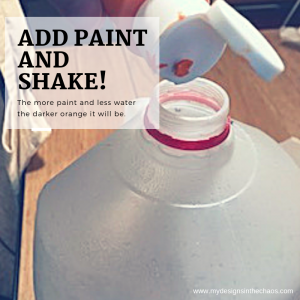
Step One
After rinsing out the milk jug, the first step is to turn the jugs orange. To keep the mess to a minimum all you have to do is squeeze some paint into the jug add a tiny bit of water (the more water the less orange it will be) screw the lid back on, and shake. Once the jug is the desired shade of orange make sure to dump out any excess paint or water. Leave the jug upside down on a paper towel to dry.
Step Two
The next step is to make the pumpkin ‘stem’. Take the lid off the jug and paint it green. Leave it to dry with the jug while you move onto the next step.
Step Three
While the jug and the lid are drying, it’s time to create the face. Grab the mix and match faces HERE and cut the decal on adhesive vinyl using your Silhouette or Cricut.
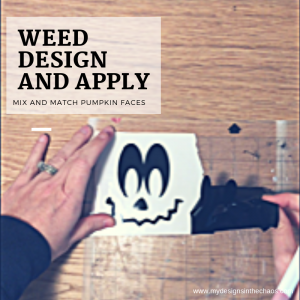
Step Four
Weed out your design and using transfer tape apply the face to your milk jug. Having trouble with your design not sticking to the jug? Check out the best way to peel off transfer tape here.
Step Five
Finally the last thing is to cut out back part of the jug so that you have a spot to add the lights.
Looking for another fun Halloween activity? This one is always a HUGE hit in my house.
Watch the ‘pumpkins’ come to life in the quick tutorial video here:
2 Comments
Leave a Comment

Learn to develop, and grow your crafting skills!
My mission is to develop, encourage, and grow your crafting skills, and confidence through freebies, tutorials, our club, and our signature course.

Behind the Chaos...
My name is Michelle and I am the creative director behind the chaos. I'm so are glad you are here and hope you find inspiration and confidence to create something beautiful out of the chaos in your craft room and in life.
free ebook!
Bring your creativity to life quickly and easily.
This guidebook will give you a detailed look into the creative crafting cycle called the Craft Maker Process.

Wonderful idea! I love it and looks really easy to make, I will definitely try this at home.
Thanks! Can’t wait to see what you create! 🙂