Fireworks craft with Stars and Stripes SVGs
share on social:
This week our project just explodes with summertime nostalgia, and you’re going to love how this fireworks craft adds a burst of color to your home decor!
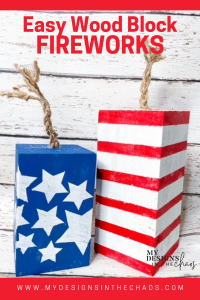
You all did your patriotic duty and voted for your favorite fireworks craft SVG file on Instagram last Sunday. Stars won out over stripes by a landslide, so that’s what we’ll make together. But the download file will have the stripes svg too, because what are stars without stripes anyway?
As always, Club Chaos members will have access to both designs the same day as the Facebook live.
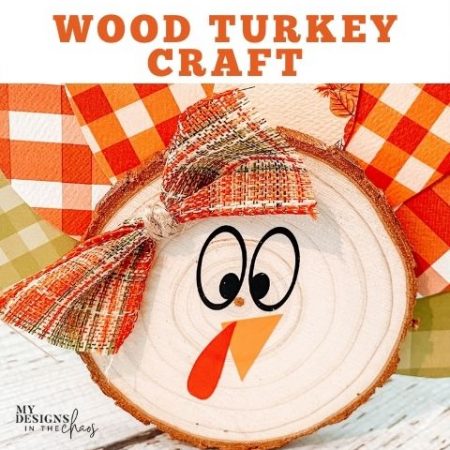
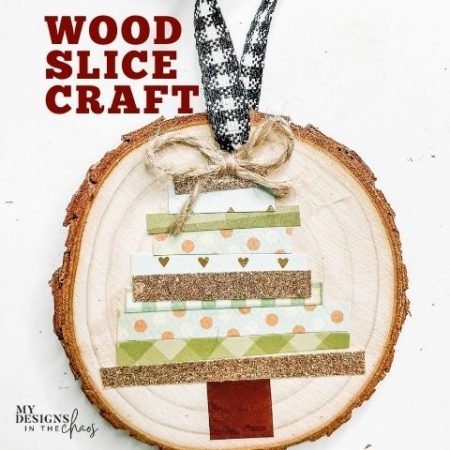
Here is a sneak peek at a couple other patriotic files that are exclusive to Club Chaos members that you might also love.
![]()
![]()
Learn more about the Club Here:
Follow along as we make one of the fireworks live together on our Make it with Michelle series here:
How to make your own fireworks craft:
Supplies we’ll use for our fireworks craft:
- 4×4 post (I had Home Depot cut one into various sizes)
- Paint (blue chalk paint, white acrylic or chalk paint, and red too if you’re doing the stripes)
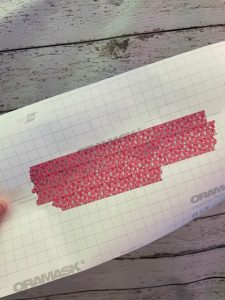
- Adhesive vinyl to use as a stencil or Oramask
- Tweezers (optional – you may want to use them to help peel off small pieces of the stencil)
- Foam brush
- Thick twine
- Scissors
- Glue gun and glue
- Fireworks craft svg in stars and/or stripes
Step One
Use the free stars svg to make the stencil for your fireworks craft. Make sure to weed out the stars, since that’s what we want to paint on the post.
For an alternate method, you could paint the post white. Then weed out the stencil the opposite way (leaving the stars), and then arrange the stars on your post. Paint the post blue, and when you peel off the stars, you’ll see the white you painted earlier.
Normally you’d use transfer tape to attach a stencil. Since this is all together as one piece, I just peeled of a small piece of the backing and attached it. Then I kept pulling and peeling the back off, placing the stencil as I went. If you’re comfortable using transfer tape instead, you could totally do that. The stencil does not have to be even, and that’s the fun part of this project.
Pro Crafting Tip: If your machine cuts a little too deep (like mine did!), try putting a few pieces of washi tape on the vinyl backing to salvage it.
Step Two
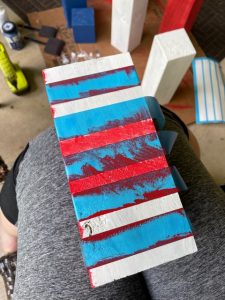
When you peel the stencil up, it will peel up a little of the paint (especially if you use 651 vinyl for the stencil), but that’s okay. We’re going for the rustic, weathered look anyway, so that works. Use your fingers to smooth down the edges of the star stencils to make sure your star shapes are solid and ready for paint.
Use a dry foam brush to dab white paint into your star stencils. Don’t use back and forth motions like you would normally paint. Since we’re using a stencil, we want to gently dab with the brush to help keep the paint inside the stencil area. You can make your fireworks as solid or as rustic as you want, with more or less paint.
Here is an example of when I painted the stripes:
Step 3
Peel the stencil off. I like to peel the stencil off when the paint is still damp because it helps keep the stenciled paint from coming off.
Step 4
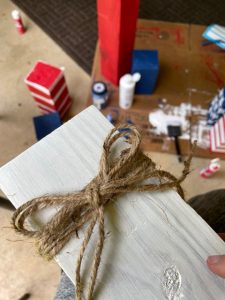
Get your twine — I cut mine into thirds because I wanted more fluff at the top. Put a large dab of hot glue on the top of the post and hold the end of all three strings. Hold the strings straight up so they dry that way. Loosely braid or twist your twine pieces, because that will help add a little bulk to it. When you get near the top, use another dab of hot glue to seal them together. Trim the tops if you think it’s too long.
Fray the tops of the twine pieces and separate the strings out so it looks like it’s exploding a little, just like a real firework.
You could even paint the tip of the twine black to make it look a little bit singed!
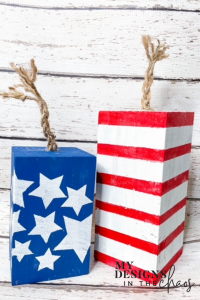
Your own Fireworks Display
This project is a super simple way to display the red, white and blue colors we love so much in summer. All we did was take some wood rectangle posts, use the fireworks craft svg (in stars, stripes, or both!), dabbed a little paint, and glued on twine to top it all off. It’s a great way to celebrate July 4th, but these adorable fireworks will burn bright all summer long.
Other ideas for making these firework crafts really pop:
There are so many other options for these wooden blocks and the free stars svg and stripes svg. You can make taller sizes and use them to decorate your patio or porch, and attach solar lights to the top to make them functional as well as decorative. Use them for a kitchen table centerpiece or outside on a picnic table. You could even put them on a tray with sand and sea shells or strings of red, white and blue beads. You could match these two up with a solid white one with with a cute twine bow. Or, paint a post solid red post and use a flag pattern or other decorative ribbon around the top.
There are so many possibilities, and we’d love to see how you use these stars and stripes svg files to make your own firework crafts! Make sure to show them off and tag us on Instagram and Facebook, and spread the love about Make It With Michelle Mondays. Don’t forget to vote Sunday over on Instagram for next week’s project!
Download your FREE Stars and Stripes SVG file here:
Please Note: If you are downloading this file on a cell phone or tablet you will need to have an app to unzip and access the file.
Check out a few more exclusive Club Chaos Designs perfect for the 4th of July!
![]()
![]()
Learn more about the club here:
If you love these designs you might also love some of these other patriotic freebies available on our site:


Learn to develop, and grow your crafting skills!
My mission is to develop, encourage, and grow your crafting skills, and confidence through freebies, tutorials, our club, and our signature course.

Behind the Chaos...
My name is Michelle and I am the creative director behind the chaos. I'm so are glad you are here and hope you find inspiration and confidence to create something beautiful out of the chaos in your craft room and in life.
free ebook!
Bring your creativity to life quickly and easily.
This guidebook will give you a detailed look into the creative crafting cycle called the Craft Maker Process.