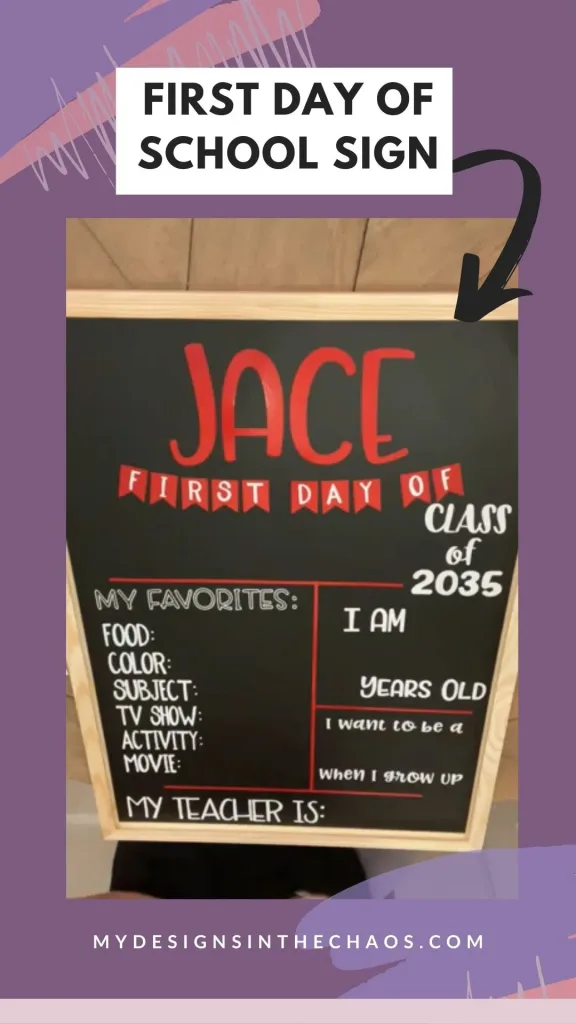
This First Day of School Sign is an Easy Way to Start the School Year off Right
share on social:
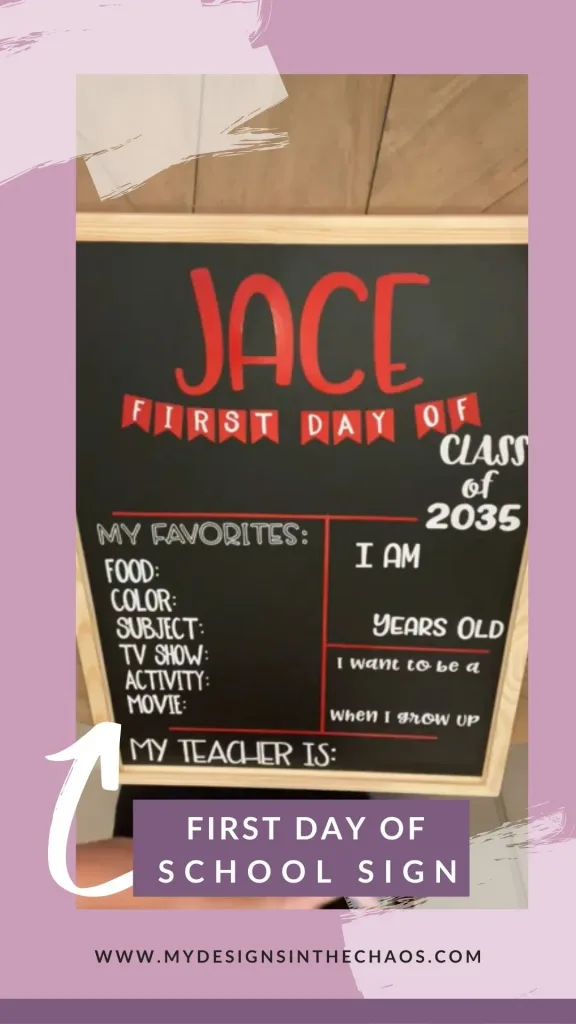
This first day of school sign will help your students make the grade as they start the new school year!
This project is time consuming, but the steps are all pretty simple and easy to pull it together beautifully in the end.
I don’t know what it’s been like at your house, but it has been a crazy town around here getting all the kids ready for back-to-school.
We have a tradition where we take a first-day picture with a back-to-school sign. It totally slipped my mind that my youngest needs one this year too!
So now I am going to make the first day of school sign for my youngest son because he is starting pre-K.
We let them pick out the colors, and then we fill all the blanks each year.
This was kind of a last-minute project, so I used scraps to make all the pieces.
The cool thing about these boards (we have ten or so of these board designs in our Club Chaos membership) is that you can really personalize these.
You can put their age, height, or any information you want to include.
You can also mix and match fonts.
If you struggle with matching fonts, you should know that’s one of the things we cover in our self-paced design course, 123-SVG.
The course goes into a lot of detail about font pairing, design, and using design software.
Signups for this course open up periodically, and we do a live version of the course every so often too, with live Q&A sessions and a very active Facebook community.
Watch the replay here:
Supplies for this first day of school board:
- Chalkboard (I used 17×23, but use one in whatever size you want – you may want to look for one that’s lightweight, especially for the smaller kids)
- Rubbing alcohol and a rag
- Adhesive vinyl in colors/patterns your child will like
- Transfer tape
- Scraper tool
‘Teacher’ Tips for this lesson:
- In the video you’ll see that I tried cutting a piece of vinyl for the sign several times, and it it just wouldn’t cut properly. Sometimes that can be the blade, the speed or things like that. But sometimes it is just the type of vinyl. The same blade with the same settings on another brand of vinyl cut perfectly.
- If you’re doing a large project, you can trim off the excess vinyl as you weed so it doesn’t get stuck back on the design as the piece you’re peeling off gets bigger.
- Print out a sheet of what you want it to look like. That will help a lot when you try to line it up. I am using my older boys’ boards for guides, but printing it out will help.
- You can also lay out all your pieces before you start transferring the adhesive vinyl to the board to get an idea of where everything should go.
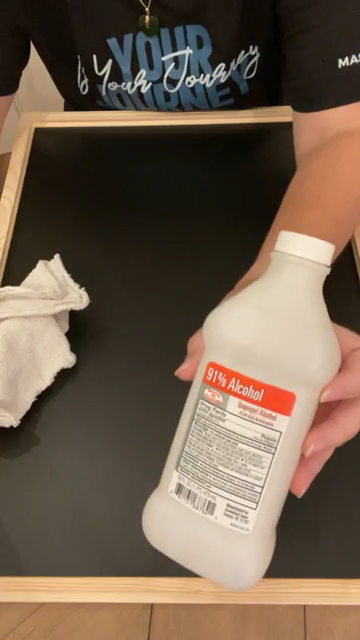
Step one
Use some rubbing alcohol and a clean rag to clean the surface of the chalkboard.
Set that aside to dry and cut and weed the design elements in your vinyl.
Since this adhesive vinyl, weed out all the parts you don’t want on your project.
If you use a 12×24 sheet you could cut it all at once and place it all together.
I used scraps because that’s what I had, and I also like being able to move, mix, and match pieces around.
That’s just personal preference for however you want to make your board both ways will work.
Snap weeding or slow and steady?
Which style of weeding do you prefer?
Are you a snap weeder, ripping off all the excess vinyl in one quick pull?
Or do you go slow and peel it up a little bit at a time?
I pull it off all at the same time quickly once in a while, but if I don’t have a spare piece of vinyl and I only have that one chance to get it right, I usually just go slow.
My motto is slow and steady wins the race.
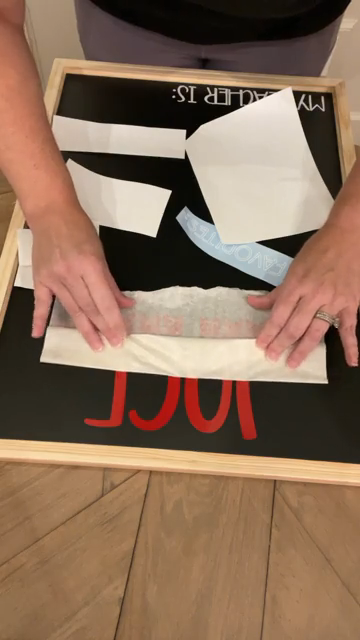
Step two
Use transfer tape to place your adhesive vinyl on the board.
You can use clear or paper transfer tape.
You can see better with clear, but remember that clear transfer tape tends to be stickier.
Use your scraper to make sure it’s really picking up the design. Peel the back off the vinyl and stick it on the board.
Then use the scraper tool again to flatten it out and make sure it is really applied on the board well.
Peel the transfer tape up.
Take it slow here, in case the vinyl wants to be difficult or doesn’t all stick.
If you’re using paper transfer tape, you can straighten out the piece of tape and use it for another section of vinyl.
Step three
We’ll repeat the process to attach all the sections and titles to the board.
You can be super specific and use a ruler or measuring tape to place the pieces exactly in the center or a certain distance apart from each other or the edge.
I like to just eyeball it, so that’s what I have done here.
I attached the first piece at the bottom of the board, and next, I did the top.
If eyeballing it is not your jam, use a ruler to make sure it is exactly where it needs to be so it doesn’t drive you crazy every year when you take pictures for the next 12 years.
When you’re placing all the headings, keep in mind that you need enough room to be able to write in the answers.
Don’t try to make all these headings be all exactly in line, because if they’re not exact, it will really be noticeable.
Stagger them a little and it will look great. It helps things look a little more balanced.
What kind of tape is that anyway?
There were a few questions during the live video about the paper transfer tape I was using.
It is called Green Star. I like paper transfer tape because it’s really easy to remove. Sometimes you can’t see through it all the way through and that can be tricky.
I also love the clear transfer tape at Expressions Vinyl.
The paper tape is so much less tacky. Sometimes transfer tape will just not let go of the vinyl.
Keep that in mind. Sometimes it’s not you but just what you’re working with or the surface you’re trying to apply it to.
When you’re peeling the tape up, if the vinyl is coming off with it just push the transfer tape back down over that part and start peeling it back again.
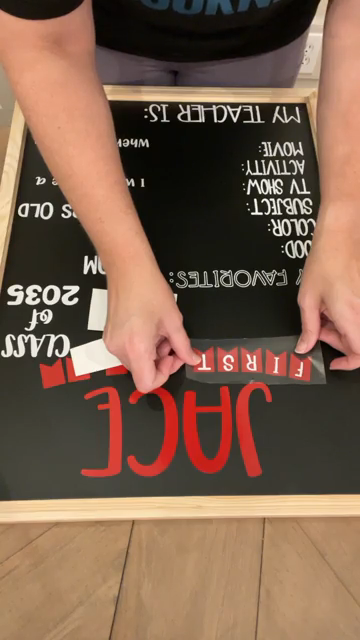
Step four
I used clear transfer tape to line the words up exactly right on the banner flags. Sometimes it’s easier to line things up when you can see through the tape.
Step five
Add adhesive vinyl lines in color to help break up all the white writing of the first day of school sign.
You could use transfer tape if you want for this but I just peeled them off and placed them.
It’s totally up to you if you want them to go to the edge or how thick you want them to be.
You can also add a white “string” for the banner with a white chalk pen.
Making the first day of school special is easy to do with this project.
It’s is as easy as cutting out the adhesive vinyl headings and placing them on the board with some decorative touches.
We would love to see your first day of school sign, so please post a pic in our Facebook community.
We’ll see you on Mondays for Make It with Michelle, and check our Instagram page for the chance to vote for which design we’ll use for our Monday projects.
This first day of school sign SVG file along with a bundle of others can be found inside the Club Chaos membership. Learn more about the Club HERE.
Here is a pic of all three of my boys on their first day back with each of their personalized signs: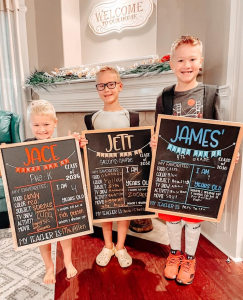
You can also go with a more simple design like I did with my daughter since she is a little older. Here is her first day of school sign: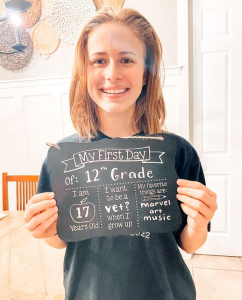
You May Also Like

If you liked this first day of school sign, pin it now!

Learn to develop, and grow your crafting skills!
My mission is to develop, encourage, and grow your crafting skills, and confidence through freebies, tutorials, our club, and our signature course.

Behind the Chaos...
My name is Michelle and I am the creative director behind the chaos. I'm so are glad you are here and hope you find inspiration and confidence to create something beautiful out of the chaos in your craft room and in life.
free ebook!
Bring your creativity to life quickly and easily.
This guidebook will give you a detailed look into the creative crafting cycle called the Craft Maker Process.