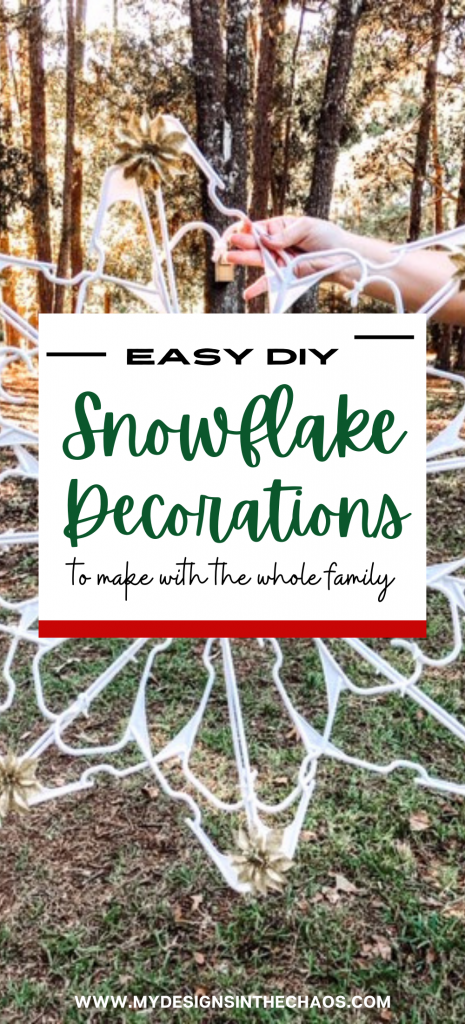
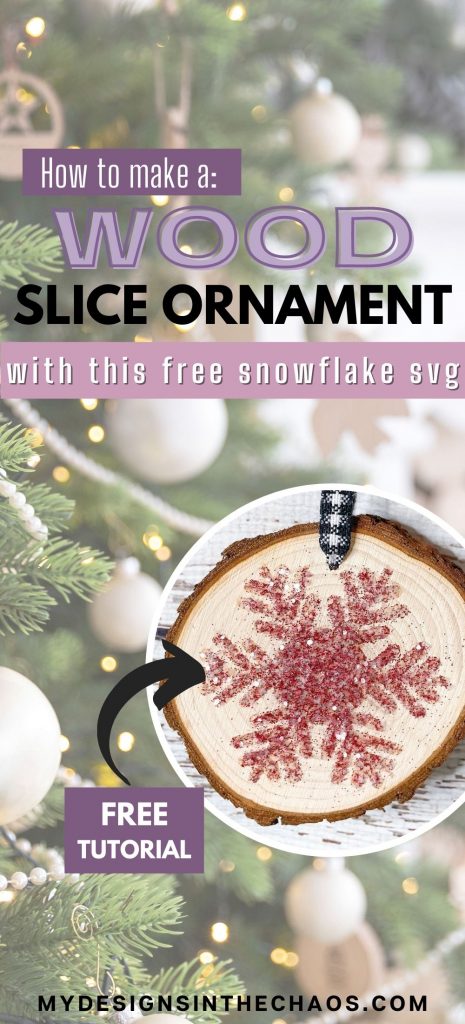
Use this Free Snowflake SVG to Make the Most Festive Wood Slice Ornament in Just 6 Steps
share on social:
Our cute and totally free snowflake svg takes center stage in this Make It with Michelle Monday project.
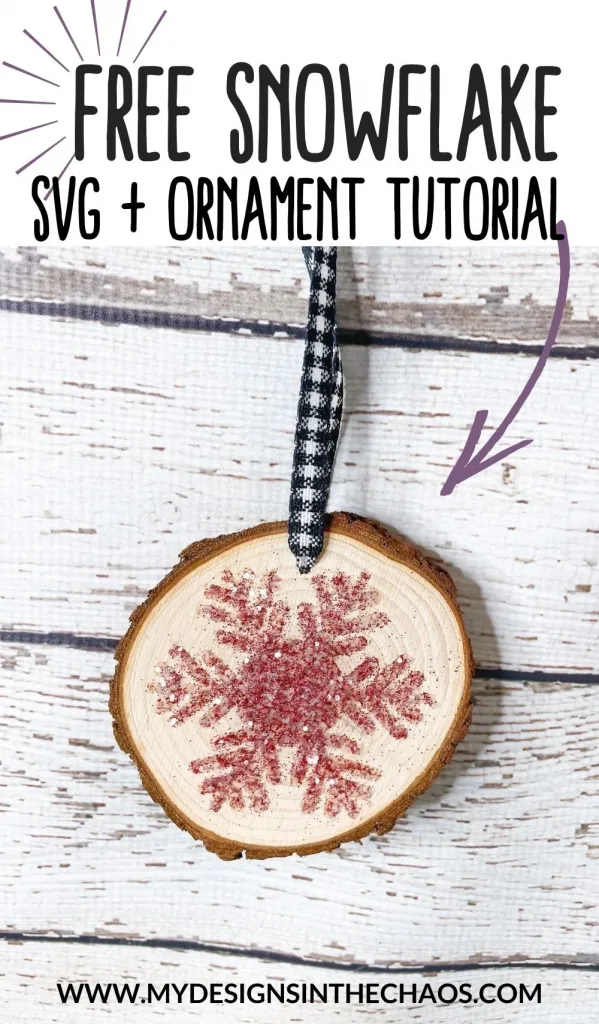
We can use a stencil of one of our favorite symbols of winter and add some glitter to make a sparkly snowflake wood slice ornament.
As you know, here at My Designs in the Chaos, it’s our goal to develop, encourage, and grow your crafting skills and confidence.
We do that in many ways.
We share free files and project tutorials, we do these Facebook live projects, we have a membership group that we provide support in, and we also do a couple of design courses so you can learn how to turn your ideas into projects.
If you want in on the Chaos, check out our Instagram stories and our Facebook group, and find our Make it with Michelle live Facebook videos, when we’ll make a new project every Monday.
I like to use the stuff I already have in my craft space. If I do one project with something, I like to do several projects with that product.
We have made a few really easy DIY Christmas crafts with wood slice ornaments for our Make It with Michelle projects, like a chalkboard countdown to a Christmas ornament.
And we used a Bible verse of the birth story as background on wood slices also for phrases like “glory” and “fear not.” They were super cute festive DIY ornaments.
This time we’re going to make a snowflake wood slice ornament using a free snowflake svg that will be linked at the bottom.
You can use this snowflake wood slice ornament on your tree, hang many of them together to make a garland, or leave the string off and display it on a shelf or table.
Catch the Facebook Live Replay Here:
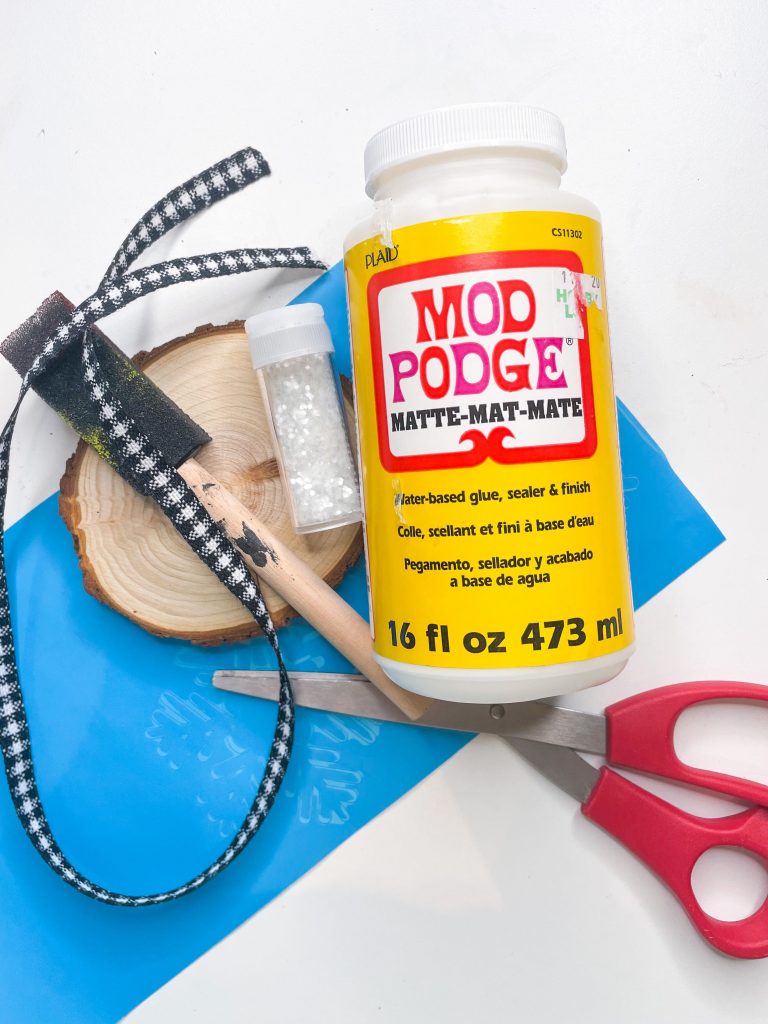
Other supplies and tools needed along with the free snowflake svg…
- Wood slice
- Ribbon (I used black and white)
- Oramask 813 stencil vinyl (or other vinyl to use as a stencil)
- Weeding tool
- Transfer tape
- Mod podge
- Foam brush
- White glitter (or red or green or even blue)
Step one
Thread your ribbon through the hole. It’s easier to put the ribbon through before we start on the snowflake part of the ornament.
Step two
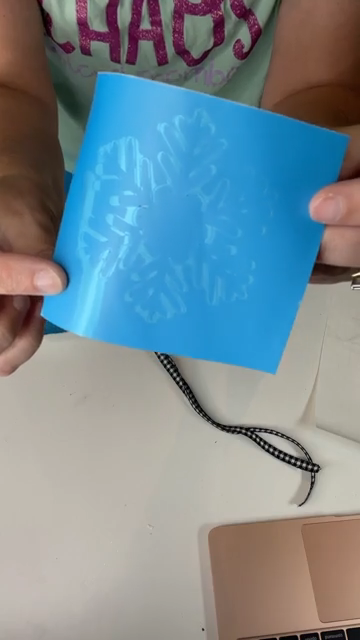
Cut the stencil out with our free snowflake svg file. We’re using a stencil for this project, but we’re not using it to paint this time.
Peel out the snowflake, because we want to get rid of all the places we want the glitter to go.
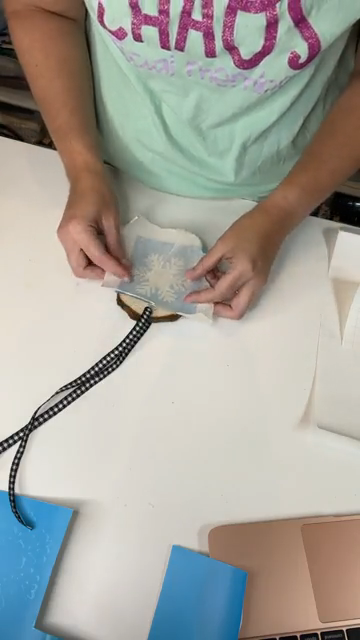
Use transfer tape to transfer the snowflake stencil onto the wood slice.
It’s okay if the transfer tape gets a bubble, but just make sure that the stencil does not have any bubbles.
Step three
Place your stencil on the wood slice, and position it where you think it will look best. You can measure if you want, but I like to just eyeball it.
Wood slice ornaments are unique shapes and sizes, so remember that when you’re placing your snowflake.
It’s okay if it’s not perfectly centered.
Use your scraper to burnish it onto the wood slice so you know it’s really pressed on there.
Peel the transfer tape back flat against the wood slice and remove it slowly. I used paper transfer tape because that is what I had available, but you could use any transfer tape you like.
If your stencil doesn’t cover up the whole surface of wood slice ornament, trim off an extra piece from the other side if there is an overhang or trim a piece you didn’t use and cover up the open space.
When you’re using paint or glitter, you want to make sure the surface you don’t want to be painted or glittered is covered. Is glittered even a real word?
Step four
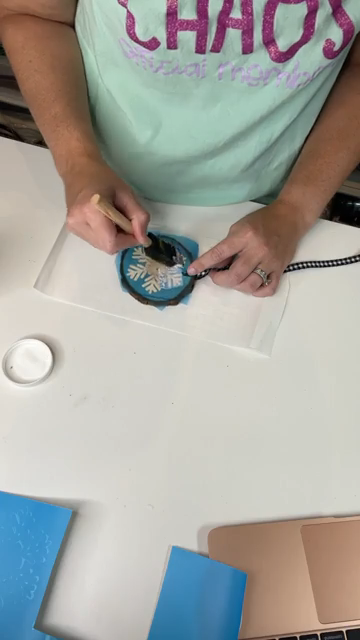
Use a foam brush and brush on a light layer of Mod Podge across the stencil on the wood slice.
Just make sure that glue gets on all the areas where the glitter goes.
It doesn’t have to be a thick layer, but make sure it’s sticky and that it is everywhere you’ll glitter.
Step five
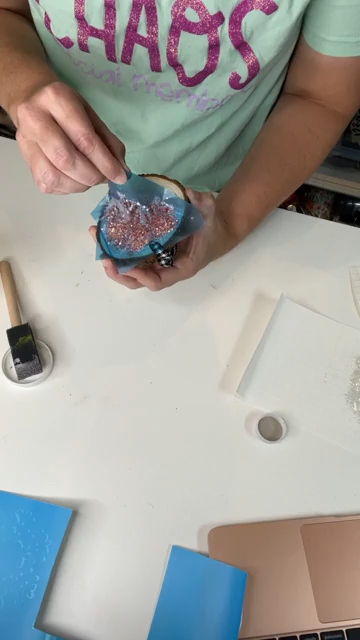
Sprinkle glitter over the snowflake stencil.
You probably want to put something down under the wood slice to catch the extra glitter.
Move the wood slice around to get glitter in all the parts of the snowflake and then shake off the extra onto the sheet you out under the wood slice.
Pour the extra glitter back into its container to use for another project.
Tip:
I used the white glitter, and the design did not pop as much as I hoped it would, so I added some red glitter too, to make peppermint colors for the snowflake ornament!
Step six
Peel off the stencil and we’ll get to see our pretty snowflake.
Once the Mod Podge is dried, spray a sealant over it.
Tie a bow into your ribbon to finish your ornament.
This snowflake wood slice ornament is so easy!
It’s just using a wood slice, our snowflake svg file to make a stencil, mod podge, and glitter with a cute ribbon or piece of twine to finish.
If you liked this you may also like:
What else can you make with this free snowflake svg?
- Use glitter card stocking make a sparkly snowflake garland
- Add some snowflakes to our mixed media Christmas craft canvas
- Use some heat transfer vinyl to make a snowflake-themed tote bag
- Cut out snowflakes on card stock for decorating windows
Join us again next week for another episode of Make it Monday with Michelle. It’s a fun way for you to be inspired and actually create something instead of just collecting digital files and supplies.
Download the free snowflake svg here!
Do you love this free snowflake svg project? Pin it for later!

Learn to develop, and grow your crafting skills!
My mission is to develop, encourage, and grow your crafting skills, and confidence through freebies, tutorials, our club, and our signature course.

Behind the Chaos...
My name is Michelle and I am the creative director behind the chaos. I'm so are glad you are here and hope you find inspiration and confidence to create something beautiful out of the chaos in your craft room and in life.
free ebook!
Bring your creativity to life quickly and easily.
This guidebook will give you a detailed look into the creative crafting cycle called the Craft Maker Process.