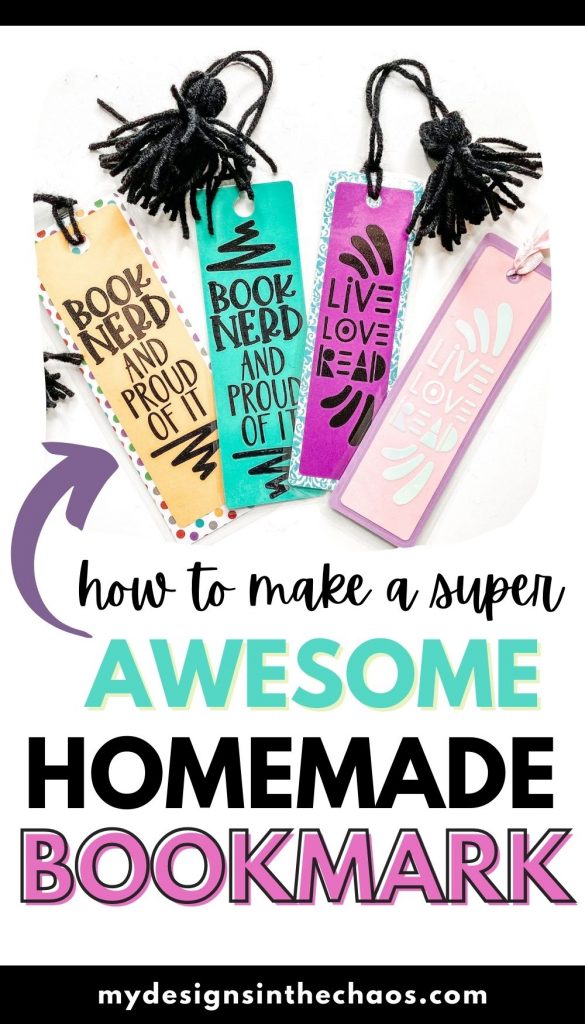
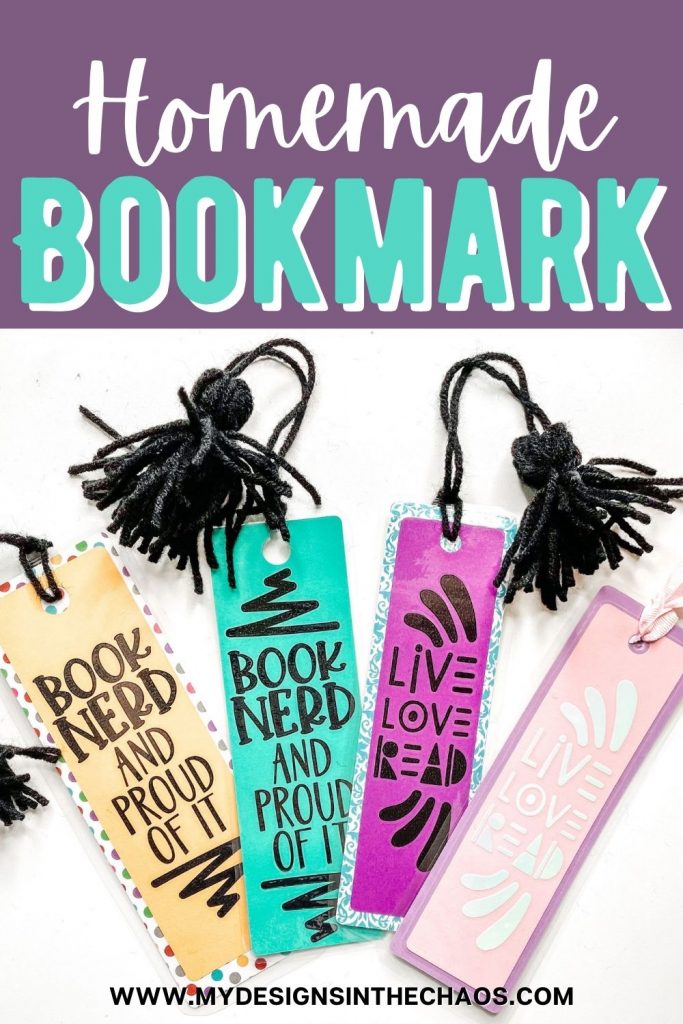
Homemade Bookmark for All Your Readers
share on social:
We love our e-readers and tablets, but there’s still nothing quite like thumbing through an old favorite mystery or diving into a new bestseller. So this week we’re making our own homemade bookmark!
They’re super easy, cute, and they can be personalized to make the most thoughtful and adorable little gifts.
We shared this tutorial as part of our Make It with Michelle Monday series, and you can catch a replay of the Facebook live video:
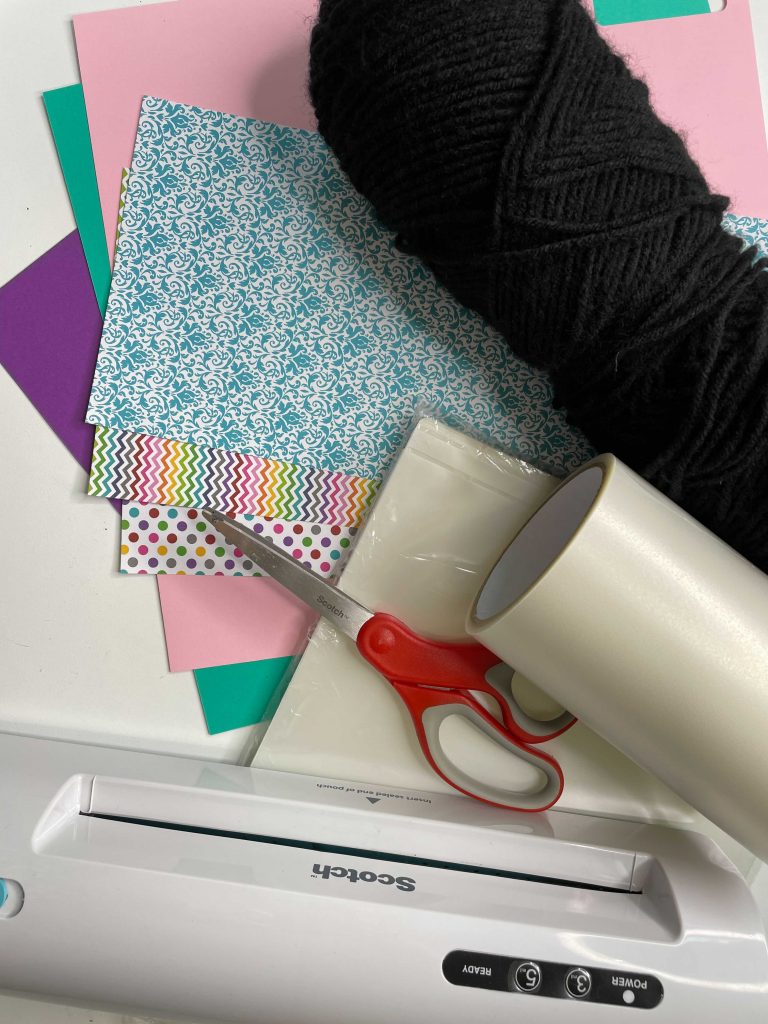
Supplies and Tools to Make Your Homemade Bookmark
- Free bookmark svg file
- Cardstock (65 weight)
- Adhesive vinyl in a coordinating color
- Laminator and sheet
- Mounting squares if using multiple layers (optional)
- Scissors, weeding tool and scraper
- Yarn, embroidery floss or ribbon
- Hole punch
Step One
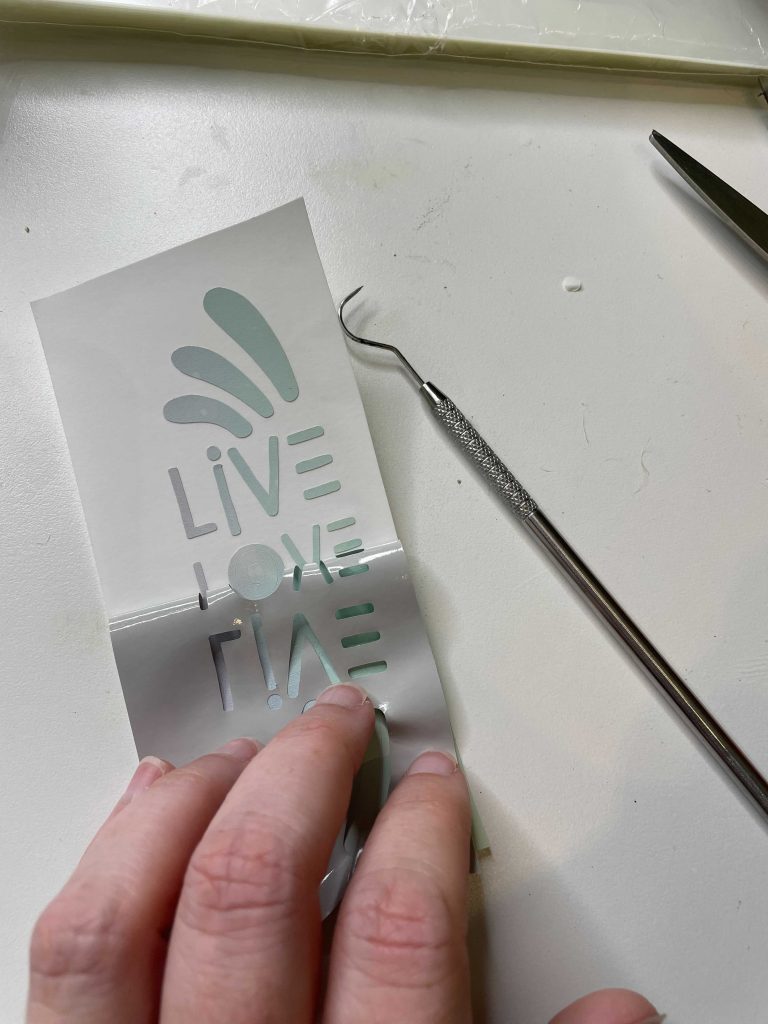
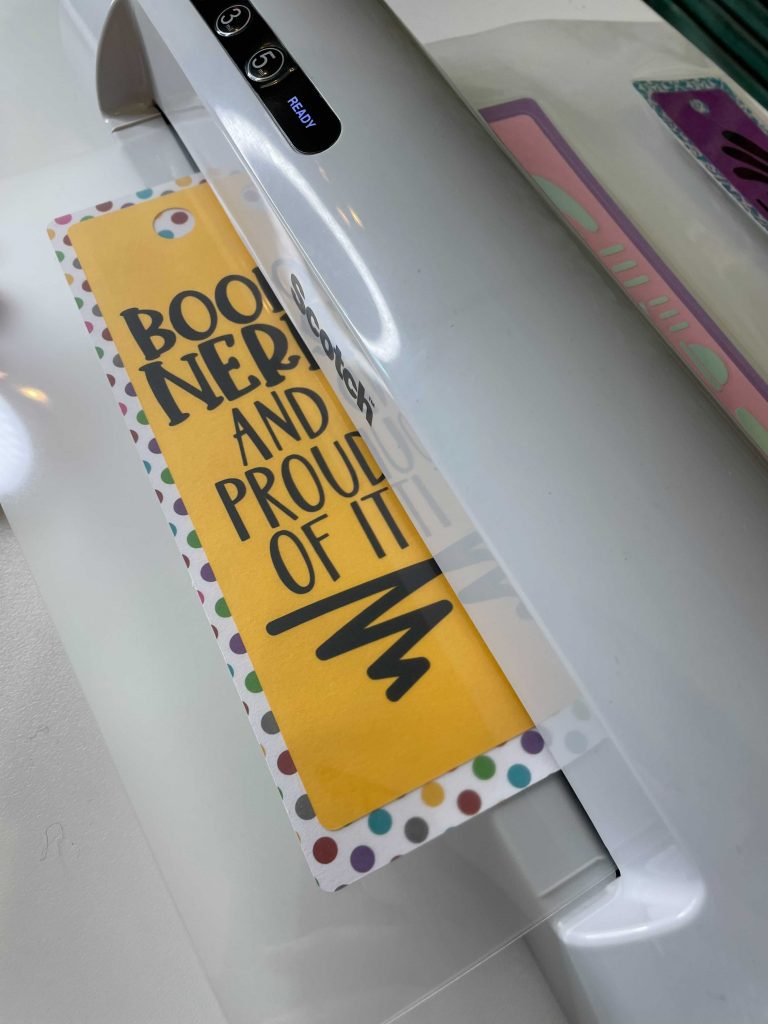
Cut out the bookmark on cardstock and the free bookmark svg on adhesive vinyl. (Club Chaos members can access the designs in the hub the same day as the Facebook Live).
Weed out the vinyl design. If your vinyl sheet is curling up a bit as you’re weeding, you can use a piece of washi tape to hold one end of it down, or a couple of pieces to hold both ends down.
That adhesive vinyl is really sticky so be careful not to peel off your words with it. Just remember that slow and steady wins the race and that you don’t have to tear it all off at once.
You could use a patterned cardstock for the back piece and it would make it even more festive.
Or you could add another layer to the back, using a patterned cardstock for that, and it would frame the solid color piece perfectly.
This would be a good place to get the kids involved too.
They could draw on the back of the bookmark, or write a cute message to Grandma and decorate it to make it extra special. You could even put someone’s name or initials on the back.
Step Two
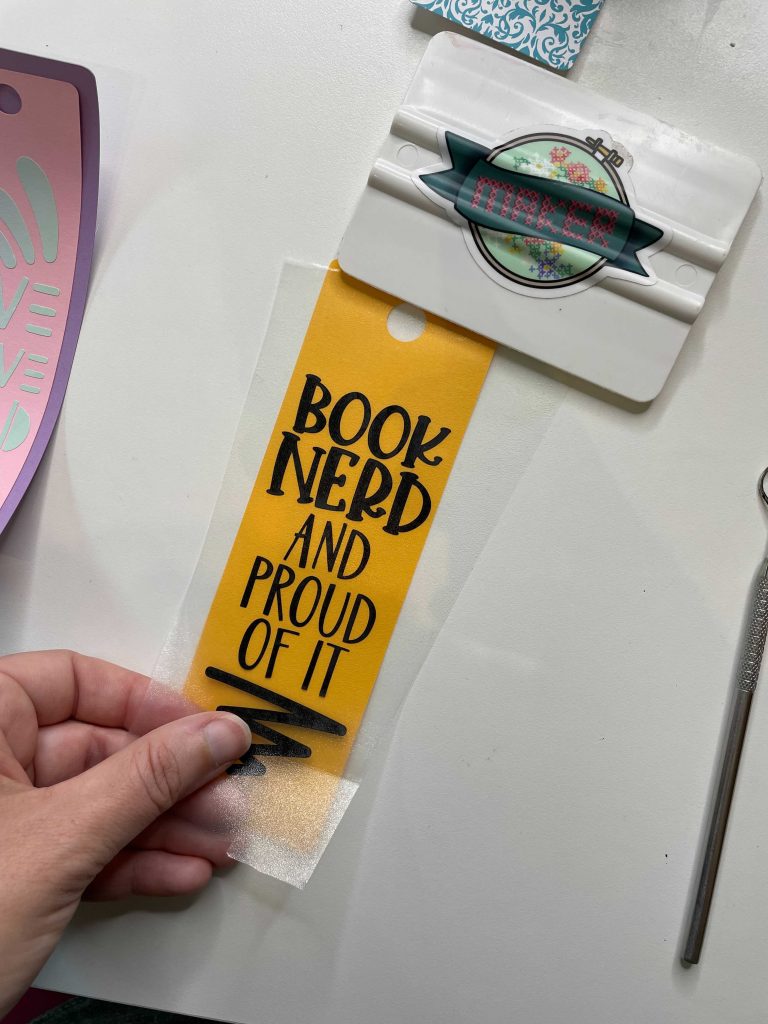
Cover your vinyl design with transfer tape and get ready to place it on your homemade bookmark.
You can totally measure it so you place it exactly in the center, but I just eyeball it. Place a small section down and then use a scraper to flatten it.
Be careful when you pull up the tape because static electricity can pull up the design.
If using thinner weight cardstock or regular paper, be extra careful and peel the transfer tape off slowly.
Step Three
You could leave your bookmark plain, but to make it a little sturdier, laminate it. If you’re using multiple layers, you can use mounting squares to separate them.
Put your bookmark in laminate sheets up at the fold and run the sheet through the laminator.
If you’re making several, you can put several of them on the sheet at the same time.
Once it runs through the laminator, trim around the outside, but not too closely — you don’t want your homemade bookmark to peel apart.
Also, be sure to round the corners a bit since those corners can be a little sharp! Feed it through the laminator a second time just to make sure the seal is good.
Step Four
Now our homemade bookmark needs that last finishing touch.
You could totally finish it with a piece of ribbon, but for this bookmark, we’re going to make a tassel. Take the yarn and wrap it around four fingers and keep in mind that however big you want your tassel, that’s how big you want to wrap it.
Wrapping around three fingers will make a smaller tassel than wrapping around four. Wrap it about 20 times. Trim off the last part of the yarn.
Next, cut a piece of string that we’ll use to attach the tassel to the bookmark. Loop that piece of yarn through the hole in your wrapped yarn and tie it in a knot tight around the looped pieces.
You’ll want the pieces on the sides of the knot to be even. Cut another piece of yarn and tie it around the loop ‘bubble,’ about a third of the way down from the knot.
Now cut through the looped pieces at the bottom so they are no longer loops. And that’s your tassel! You can use your scissors to even them out if needed.
Use a hole punch to cut through the laminate layers over the cut-out hole in the bookmark.
Put the two yarn pieces through the hole from the back. Tie them together, trim off any extra pieces, and pull the tassel through.
Now you finished your homemade bookmark. With the free bookmark svg, we put a vinyl design on cardstock, laminated it, and made a tassel.
It’s an easy way to make all of your favorite book-lovers happy!
I can give this bookmark to…
Anyone!
These sweet DIY bookmarks would be great treats for your summer readers.
They would also make great gifts for your book club friends or a little something extra to tuck in with end-of-year teacher gifts.
You could even put all the students’ names on the back with the school year for a nice keepsake.
Or maybe your friend who loves to cook wants one to help mark her favorite cookbook recipe.
There are so many possibilities and ways to be creative with these, and we can’t wait to see how you make yours!
And while you’re at it, if you make yourself a bookmark or two (which you should totally do), let us know what book you’ll be using it for because we’re always looking for new titles to try next.
Connect With Our Crafting Community
As always, I can’t wait to see what YOU are crafting, so tag us here and on Facebook and Instagram, and keep an eye out for your chance to vote on the next week’s project.
Help us spread the love about our Facebook live videos and we’ll see you on Mondays for Make It with Michelle!
Download your homemade bookmark svg from My Designs in the Chaos.
If you like this homemade bookmark tutorial, you might also like:
Fireworks Craft with Stars and Stripes SVG
DIY Coloring Book Shirt Tutorial
WANT TO REMEMBER THIS? PIN IT!
2 Comments
Leave a Comment

Learn to develop, and grow your crafting skills!
My mission is to develop, encourage, and grow your crafting skills, and confidence through freebies, tutorials, our club, and our signature course.

Behind the Chaos...
My name is Michelle and I am the creative director behind the chaos. I'm so are glad you are here and hope you find inspiration and confidence to create something beautiful out of the chaos in your craft room and in life.
free ebook!
Bring your creativity to life quickly and easily.
This guidebook will give you a detailed look into the creative crafting cycle called the Craft Maker Process.


I cannot wait to make these with my sons who are just learning to read!
Perfect!