Layering Iron On Vinyl
share on social:
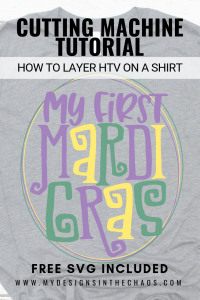
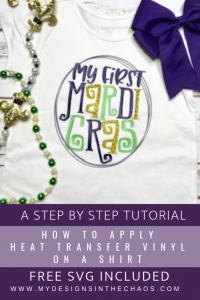
Layering Iron On Vinyl- Step By Step Instructions For Using Multiple Colors and Layers
Making a shirt with multiple colors of iron on vinyl (also called Heat Transfer Vinyl or HTV for short) can sound and even look a little intimidating. The cool thing about layering iron on vinyl though, is that it is actually pretty easy! Plus, the finished project can really pop. Using multiple colors will really help your projects go from meh to POW! Today I want to share with you my best tips, tricks, and suggestions on how to layer iron on vinyl.
These will be perfect for designs with multiple colors of vinyl you want to use.
PLEASE NOTE THAT THERE ARE AFFILIATE LINKS IN THIS POST. THAT MEANS THAT AT NO EXTRA COST TO YOU, WHEN YOU SHOP THROUGH OUR LINKS WE EARN A SMALL PERCENTAGE OF THE SALE.

SUPPLIES
Cutting Machine (the SVG and this technique will work with either Silhouette or Cricut cutting machines)
- Purple, Green, and Glitter Gold are what we used in the video tutorial
Heat Press or Easy Press – Any heat source will work (even an iron) but just make sure you have enough pressure and don’t burn the vinyl
Weeding Tools – This is the set that I used in the video
Weeding Ring – To collect scraps as you weed your design
Heat Press Pillow– Check out this blog post on pressing pillows to explain why and how to use them
Free Mardi Gras SVG Cutting Files
Check out more of our favorite supplies to use with our cutting machine in our Amazon shop here.
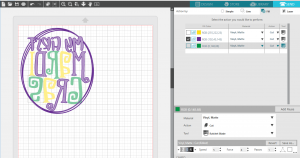
Cut The SVG File
This first thing that needs to be done (as with any cutting machine project) is the SVG file itself needs to be cut out on your machine. In Silhouette Studio Designer Edition and in Design Space it is very easy to cut by color. Select which elements you want to be cut in which color and then load and cut. Remember the shiny side for HTV always goes face down on your mat. That shiny side is actually what we call the carrier sheet. It won’t be attached on the final project.
Also, don’t forget to mirror your image before you cut! This just means horizontally flip it. It is always super frustrating when a sheet of iron on vinyl is accidentally wasted.
Having trouble with which file type to upload or maybe your design won’t ungroup by color. Knowing the difference between an SVG and PNG file types is so helpful when learning to work with your machine.
And… if you are looking for more free Mardi Gras SVG files we have got you covered!
Weed Your Design
Once each of the various colors (which will become your layers) of iron on vinyl are cut, it is now time to weed. Curious as to what I mean with weeding? These beginning terms for crafters with cutting machines will be sure to help you out. In a nutshell though, weeding is removing all the vinyl that you don’t want pressed on your final shirt. Do this for each of the layers/colors that you cut in the previous step. For our example, we had 1 section of purple iron on, 1 section of gold iron on, and then 3 pieces of the green. Green wasn’t all one piece because I LOVE saving scraps and used them for the green lettering.
Also make sure to follow my favorite weeding tips to reduce your vinyl waste. You (and your pocketbook) will thank me!
Line Up The Design
Next up in the process of layering iron on vinyl, it is time to line up the design. While we won’t press all the layers at one time, it is crucial to make sure that everything is in the proper place on our project first. Centering the design on the shirt and making sure the overall placement from the collar is correct, is an essential step in the process. But really you also want to focus on each of the individual layers… are they spaced correctly, do you know where each element will be placed, etc.
Once you have the design stuck together in layers and lined up exactly the way that you want, place it down on the shirt. Peel up all the layers of the iron on vinyl except the bottom one, then head on to the next step.
*If this sounds a little confusing take a second and watch the video linked above. I think in this case seeing exactly how I line up and then peel away is understanding. DO NOT press all the layers at one time. The iron on vinyl will get stuck to the other carrier sheets and it will create a massive mess.
Apply Heat
Now it is time for the final step in the layering iron on vinyl process. It is time to press and apply heat. Press the first layer for 5 seconds at 315 (remember though this temp depends on the type of vinyl you are using) and then remove the carrier sheet. Do not press for longer than 5 sec. You just want enough heat for the vinyl to attach. Also if you press too long on the individual layers you might have shrinking or you could potentially put a crease in the vinyl from where the carrier sheet overlaps. So remember 5 seconds at the most when layering iron on vinyl.
Also I want to encourage you to use a pressing pillow and teflon sheet. The teflon sheet keeps your vinyl from burning. It goes between the heat source and the vinyl. Parchment paper also works well for this. Pressing pillows are extremely helpful on kids garments or items with seams. They help to ensure that the vinyl gets a good even press and none of the garment seams get in the way. If you want to DIY your own pressing pillows check out this tutorial.
Then repeat that process with all of the layers. Press for a few sec, remove carrier sheet, place the next layer, and repeat. When you get to the last layer and you have removed the carrier sheet give the item one more press for a full 15 seconds.
PRO TIP: Make sure that you can see the fibers of the shirt through the vinyl once it is pressed. This way you will ensure that the vinyl is properly adhered. For more washing instructions and a printable care card head over here.
Ta-Da! You are now successful in layering iron on vinyl and your Mardi Gras shirt is ready to be worn! Doesn’t that feel good to now have the skills to be able to make shirts with as many layers/colors as you can imagine?

Now see…. layering heat transfer vinyl wasn’t so bad was it? Just a little more time consuming than working all in one color but still totally doable and the results are gorgeous. Looking for more layering inspiration? Check out this Valentine’s Day Heat Transfer Vinyl post where we walk through the steps of how to create a Valentine’s Shirt with HTV.
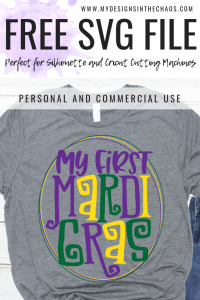
Download The Free Design Here:
Please note that the design is inside a zipped folder and will need to be unzipped in order to access the SVG file.
Looking for more Mardi Gras Inspiration? Download these 5 additional free SVG files perfect for Mardi Gras.

We are so grateful that you are here and would love if you would take a second and pin an image from above. Thank You! I can’t wait to see how you begin layering iron on vinyl!
Happy Crafting, Cutting, and Chaos!
1 Comments
Leave a Comment

Learn to develop, and grow your crafting skills!
My mission is to develop, encourage, and grow your crafting skills, and confidence through freebies, tutorials, our club, and our signature course.

Behind the Chaos...
My name is Michelle and I am the creative director behind the chaos. I'm so are glad you are here and hope you find inspiration and confidence to create something beautiful out of the chaos in your craft room and in life.
free ebook!
Bring your creativity to life quickly and easily.
This guidebook will give you a detailed look into the creative crafting cycle called the Craft Maker Process.


[…] red would really make the design pop. Worried about making it all line up? Check out this post where we show off our favorite way to align HTV […]